Thursday, April 18, 2019

Battle for Malta - Scenario 10 - Bomb Rommel's Ports

This is the tenth scenario in our Battle for Malta campaign. The campaign follows the exploits of the Country of Dampshire 369 Squadron Auxiliary Air Force fighting against the Regia Aeronautica squadriglia d'aquila - two fictitious squadrons. We use the Wings of Glory WW2 rules, slightly modified to give faster play. We use the Wings of Glory planes where the right model is available, other manufactures are used to fill in the gaps.

We use our own set of campaign rules "Wings Over Malta". These contain 6 basic missions which will be played with alternate sides as the attacker. They will be played first with "early war" planes and then repeated with "late war planes". This differs from our previous Battle of Britain campaign which was a ladder campaign that followed more exactly the historical battle.

The Background

The North African campaign was among other things a war of logistics. The logistics problems facing the Germans in North Africa were to be extremely challenging.

The primary Italian ports for shipping and embarkation to Libya were Naples, Bari, Brindisi, and Taranto. The main port in Libya was Tripoli, only capable of handling five cargo ships or four troop transports at a time.

A German motorised division required 350 tons of supplies a day or 10,500 tons a month. While reinforcements raised Rommel’s strength to 10 divisions — three German and seven Italian — they also increased his supply requirements to 100,000 tons a month.

Bristol Beaufort twin-engined torpedo bombers were based in Egypt and Malta and used to attack the Italian convoys. Although it was designed as a torpedo-bomber, the Beaufort was just as often used as a medium day bomber.

North African harbour during the German drive to Egypt, 1941.
The photo is said to have been taken by General Erwin Rommel himself.

The Action

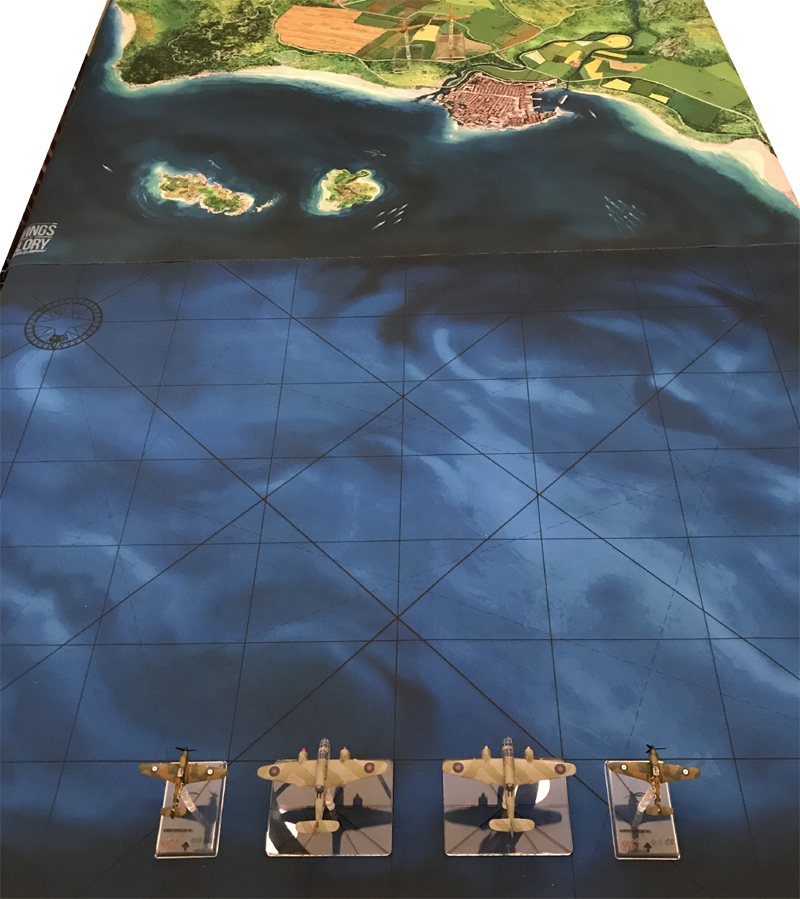
The Italian supply convoy had made it into port without the RAF being able to sink any ships. No.369 squadron was tasked with destroying the ships in port before they could be off-loaded. Two Bristol Beauforts were available to lead the attack being escorted by Pilot Officers Sir Price and Emmett Hollingberry in their Hawker Hurricanes. Flying Officer Cholmondeley Featherstonehaugh couldn't take part as he was still recovering from ditching the Beaufort.

They took of at dawn and flew in formation towards the port.


Two Regia Aeronautica Macchi C.202 Folgore (Thunderbolt) fighters were spotted over the target. These were flown by the Italian ace Capitano Vitello Tonnato and his wingman Tenente Luigi Macaroni..


The two Macchi C.202's headed straight for the attacking British. While the British were concentrating on the Italian fighters, two previously unspotted Luftwaffe Messerschmitt Bf 109 E-4's swooped in. The were piloted by Battle of Britain Aces Oberleutnant Sepp Schlangenaugen and Leutnant Otto von Dasshausen.


The 109's headed straight for the Beauforts. Shouting "It's the bloody krauts! Tally Ho!", Hollingberry headed in to protect his bombers.


Sir Price never heard Hollingberry's warning about the Luftwaffe, so he took his Hurricane head-to-head with a Macchi C.202.


The fire from the 109's cannons was devastating and one Beaufort spiralled out of control.

However Oberleutnant Sepp Schlangenaugen was concentrating too much on his kill and bullets from Hollingberry's eight machine-guns combined with some lucky shots from the Beauforts caused his tail to break off and he had to bail out.


The remaining Beaufort continued on its mission, heading straight for the port.

The Beaufort was closely followed by Luigi Macaroni in his Macchi C.202 who was in turn closely followed by Sir Price in his Hurricane who was in turn closely followed by Capitano Vitello Tonnato in his Macchi C.202. There was a hail of fire, but no aircraft were destroyed.

Dasshausen in his 109 swooped round for another pass.

Hollingberry seemed to be out of touch with the fight.


Sir Price misjudged the combat and turned away. Hollingbery was still out of touch.

The lone Beaufort couldn't take much more punishment and one engine burst into flames.


The Axis fighters continued to attack the flaming bomber, while its rear-gunner did his best to pepper the attacking fighters.

Sir Price and Hollingbery were too far away to defend the bomber.


This was too much for the lone bomber to take, and it crashed into the see just short of its target.


Having shot down the bombers, the Axis fighters headed for their airfield to re-arm, re-fuel and repair.

Hollingberry and Sir Price were left alone and with no opponents headed back to Malta with their tails between their legs.

Result

Axis Victory
  •  Pilot Officer Hollingberry: ½ Kill  
  • Capitano Vitello Tonnato: ½ Kill
  • Tenente Luigi Macaroni: ½ Kill
  • Oberleutnant Sepp Schlangenaugen: 1 Kill
  • Leutnant Otto von Dasshausen: ½ Kill

Notes

The Macchi C.202 Folgore fighters are from Armaments in Miniature (AIM), an American company that has a range of unpainted resin models in different scales. Their 9mm (1:200) scale models fit well together with the WW2 models for Wings Of Glory. All the models are very reasonably priced, the fighters cost $5 each.

Saturday, April 13, 2019

Battle for Malta - Scenario 9 - Rommel's Supplies Sneak Past

This is the ninth scenario in a Battle for Malta campaign that follows the exploits of the Country of Dampshire 369 Squadron Auxiliary Air Force fighting against the Regia Aeronautica squadriglia d'aquila - two fictitious squadrons. We use the Wings of Glory WW2 rules, slightly modified to give faster play. We use the Wings of Glory planes where the right model is available, other manufactures are used to fill in the gaps.

We use our own set of campaign rules "Wings Over Malta". These contain 6 basic missions which will be played with alternate sides as the attacker. They will be played first with "early war" planes and then repeated with "late war planes". This differs from our previous Battle of Britain campaign which was a ladder campaign that followed more exactly the historical battle.

The Background

Malta was situated on the increasingly important sea supply route for the North African campaign. It would be a major help to the Allied war effort if the supplies from Italy to the Afrika Korps troops in North Africa could be reduced. Rommel was desperate for more supplies, especially fuel for his panzers. Malta was like an unsinkable aircraft carrier that could be used as the base for many Allied strikes against Italian shipping.

The small capacity of the ports involved limited the size of the Italian convoys. Instead of running a relatively few large convoys, which would have been more efficient in terms of convoy defense, the Italians had to send many small ones, wasting fuel and escorts.

The Bristol Beaufort was a British twin-engined torpedo bomber that was developed from experience gained designing and building the earlier Blenheim light bomber.

The first operation in the Mediterranean in which Beauforts took part was an attack on an Italian convoy on 28 January 1942. The three Beauforts of 39 Squadron included in a large strike force succeeded in crippling the 14,000 ton merchant ship Victoria, which was then sunk by Albacores.

Two Beaufort Mk I's

The Action

An Italian supply convoy had been spotted, yet again, trying to sneak past Malta and 369 squadron was contacted. Flying Officer Cholmondeley Featherstonehaugh and Pilot Officer Emmett Hollingberry were sitting in deck chairs outside the dispersal hut when the telephone call came.

"Those sneaky Italians are still trying to sneak past Malta without letting us torpedo them!" said Featherstonehaugh, sound somewhat enraged, "That's just not cricket you know! And now we have the new Beaufort instead of the silly old Stringbag we'll be able to knock them for six!".

Featherstonehaugh charged over to the Beaufort, grabbing on his way the FAA crew and shouted for a torpedo to be loaded.

Above the Italian convoy were two Machi C.202 fighters flying cover.


Featherstonehaugh in the Beaufort and Hollingberry in his Hurricane took off and headed for the expected position of the convoy.


Featherstonehaugh and Hollingberry closed the convoy and the Italians headed out to meet them.


Both sides continued straight forward, no attempt at anything fancy yet.


Both sides opened fire. Smoke started pouring from Cholmondeley Featherstonehaugh's starboard engine.


The fight continued and now even Cholmondeley Featherstonehaugh's rear-gunner joined in.


Hollingberry managed to get on the tail of one of the Macchi's as Cholmondeley continued on towards the convoy.


Cholmondeley Featherstonehaugh's Beaufort was in trouble, his smoking starboard engine now caught fire!


The tailed Macchi did an Immelmann turn and came on head-to-head with Hollingberry's Hurricane. Cholmondeley turned his Beaufort in an attempt to loose the pursuing Macchi.


Not to be outdone, even Hollingberry performed and Immelmann turn and was once again on the Macchi's tail.


The Italian pilot knew he was in trouble.


Ignoring his flaming starboard engine, Cholmondeley Featherstonehaugh calmly dropped his torpedo from wave-top height aimed at the convoy's leading ship.


The Italian pilot tried to dive to get away from Hollingberry on his tail, but a cloe range burst from the Hurricane's eight machine-guns caused the Macchi's engine to start smoking.


Cholmondeley managed to put out his engine fire as he turned away from the ships while being chased by a Macchi.


The Macchi could take it no more, another kill to Hollingberry.


A Macchi chased Cholmondeley's Beaufort as Hollingberry headed to rescue his friend. The torpedo headed straight towards the leading Italian ship, but went straight under it without exploding.


Hollingberry opens fire on the Macchi that is now tailing Cholmondeley.


But Cholmondeley's Beaufort could take no more, he had to ditch it in the sea.


Already seriously damaged by Cholmondeley's rear-gunner, the Macchi was easy prey for Hollingberry.


Cholmondeley and his disgruntled crew were picked up but a British submarine that was shadowing the convoy and radioing its position.

Result

Italian Victory - the convoy got through


  • Pilot Officer Hollingberry: 2 Kills 


Notes

The Macchi C.202 Folgore fighters and the Bristol Beaufort torpedo bomber are from Armaments in Miniature (AIM), an American company that has a range of unpainted resin models in different scales. Their 9mm (1:200) scale models fit well together with the WW2 models for Wings Of Glory. All the models are very reasonably priced, the fighters cost $5 each and the bombers $7 each.

The ships were 1:1200 Hallmark models sold by Magister Militum.