Lone Sherman is a wargame that puts the player in charge of a Sherman tank somewhere in France after the Normandy invasion. It has fun and challenging missions, but is not completely historical, as a Sharman would not operate alone without support. Lone Sherman was written by Mike Lambo.
The game can be played on a map using counters, but I use 12mm Minifigs models on hexes from Kallistra, houses from Total Battle Miniatures and trees from Timecast.
The Sherman was commanded by Lieutenant Michael Wilson from Minnesota.
Mission 11 - Steel Gladiators
German forces consist of a Tiger, a Panzer IV and a Panzer III. This mission requires the Sherman to destroy all the enemy tanks. There is no time limit as such, but the more time the Sherman takes, the more unfortunate events can occur. These can include such things as roads being mined or Luftwaffe air support. The starting positions of all four tanks are determined randomly, so the mission will feel different each time it is played.
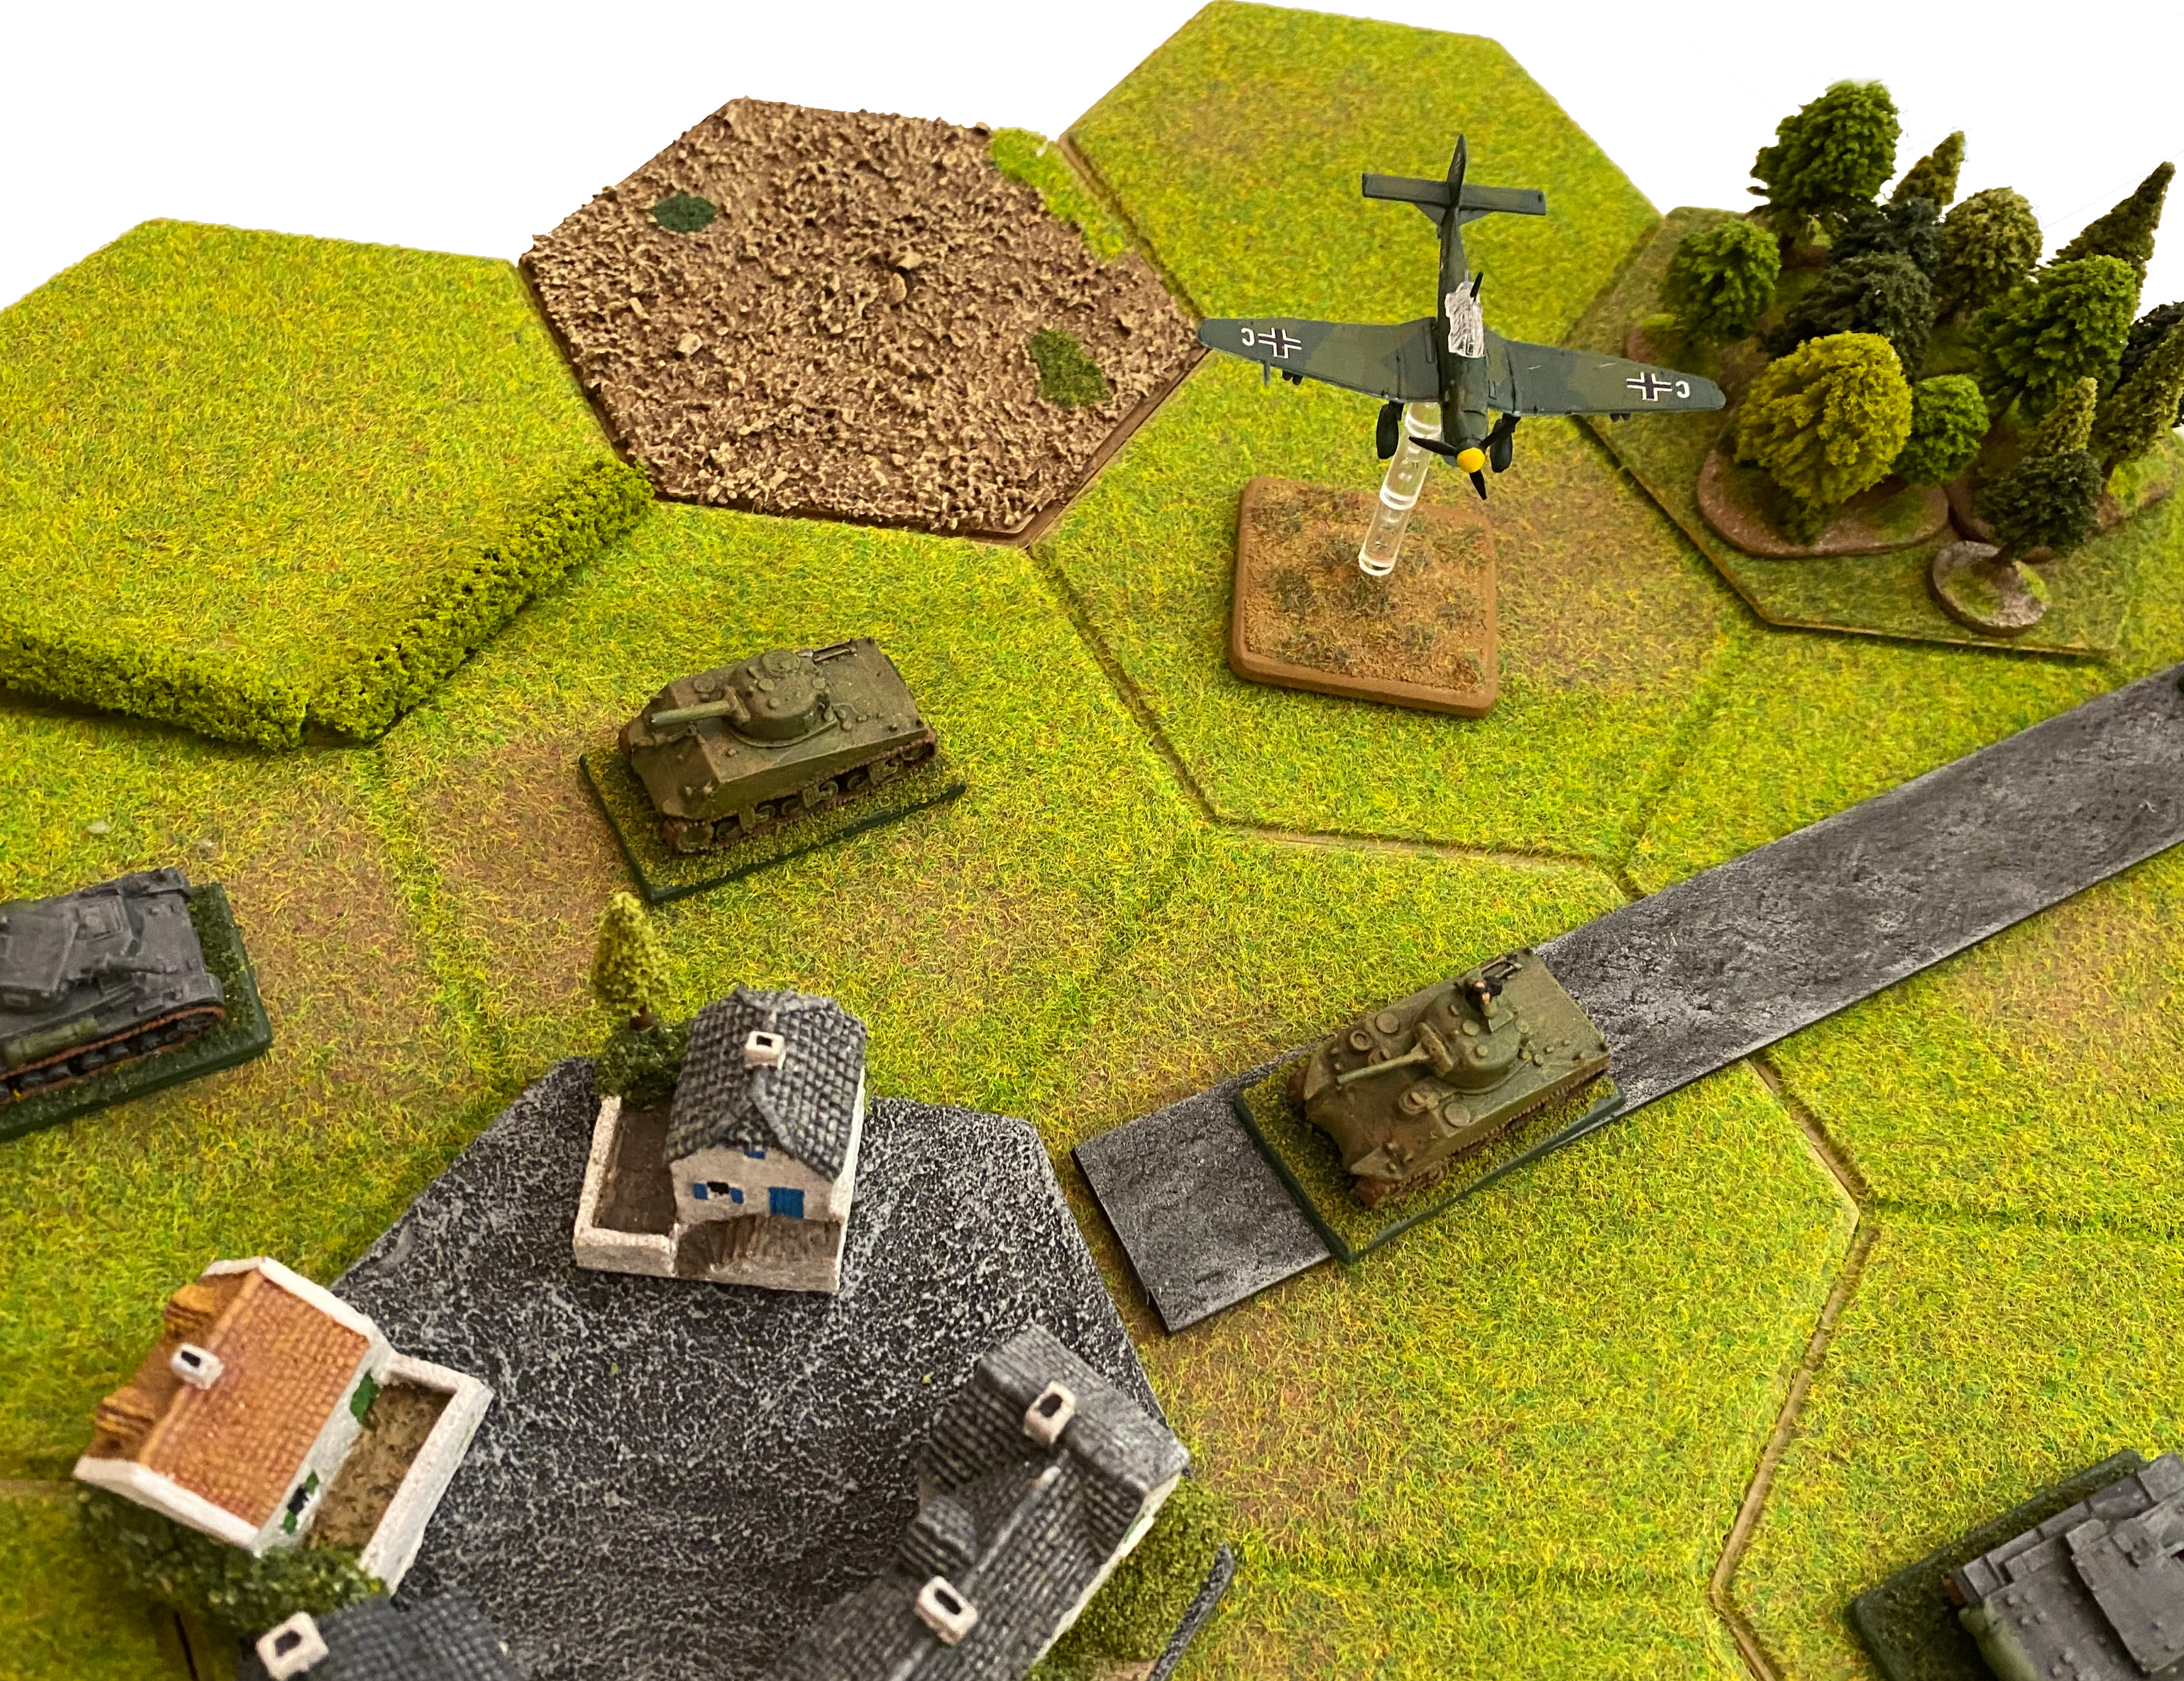
The mission started with the Sherman at the bottom of the board. The Tiger was close by, just the other side of the woods. The Panzer IV was on the road at the top of the board, and the Panzer III in a field at the top left.

The Sherman moved to another part of the field, hoping to get a better shot at the Tiger when in emerged from behind the woods.
The Tiger advanced straight ahead, ignoring the Sherman completely, the commander seemed rather confused.
The Panzer IV charged at full speed down the road and into the village.
The Panzer III had a very cautious commander, he decided that the other two tanks were strong enough to take on a lone Sherman, and just found a safe hull-down position in the field to hide in!

A Stuka lined up on the Sherman from behind. Lieutenant Michael Wilson had been watching the Tiger and was surprised by the Stuka's attack. He grabbed the turret-mounted Browning .50 caliber machinegun and opened fire, but in his rush to turn the machinegun rearward he failed to hit the diving Stuka. However, the hail of bullets still seemed to discourage the Stuka pilot who missed the attack.

The Sherman turned to face the rear side of the Tiger and opened fire, easily hitting such a big target, but failing to penetrate even the rear side armour plate. Thinking that he might have a very annoyed Tiger to deal with, he found a safe hull-down position in the field to hide in!
The already confused Tiger commander, advanced forward while trying to locate his adversary. He the popped his head out of the hatch, trying to fire but finding no target. Finally, in desperation, he laid a smoke screen to make himself a somewhat harder target.
The Panzer IV advanced out of the village and opened fire on the Sherman, but its hull-down position made it too hard of a target, and the shot missed.
The Panzer III advanced slowly towards the noise of the gunfire, and yet again its cautious commander took up a hull-down position.

The Sherman crossed the adjacent hedge to get a good line-of-sight on the rear of the Tiger. It opened fire, but without hitting the Tiger.
The Panzer IV continued its headlong charge straight for the Sherman, straight over the hedge and into the rough terrain beyond. Closing in on the Sherman's flank.

At point-blank range, the Panzer IV fired at the Sherman. The armour-piercing projectile hit the Sherman, penetrated its front side armour plate, and destroyed the tank causing it to brew-up.

Lieutenant Michael Wilson and his crew all bailed-out of the burning tank. In a hail of machinegun bullets coming from the Panzer IV, they turned and ran for cover.
The Panzer IV returned to camp and its commander ordered another victory ring to be painted on the gun barrel.