Friday, July 13, 2018

Battle of Britain - Scenario 12 - August 13th 1940 – Crystal Trouble

This is the twelfth scenario in a Battle of Britain campaign that follows the exploits of the fictitious Country of Dampshire 369 Squadron Auxiliary Air Force. We use the Wings of Glory WW2 rules, slightly modified to give faster play, together with our own set of campaign rules. We use the Wings of Glory planes where the right model is available, other manufactures are used to fill in the gaps.

The Background

Adlertag; the great assault which it was hoped would bring Britain to its knees. The bombing force consisted of dozens of Dornier 17s led by Oberst Johannes Fink. His headquarters was in a bus on the cliffs of Cap Gris Nez where he could actually see through his binoculars the defenses of Dover. Today he deserted the bus for a pilot’s seat in the lead bomber.

The plan was that the Dornier 17s were to be accompanied by an equally large number of Bf 109s. However there was a communication problem, probably the wavelength had been altered and the bombers’ radios had not been fitted with the new crystals required. The accompanying fighters had radios which were fully functional.

The weather turned out to be poorer than expected. When Göring got this disappointing news, he postponed the operation, but by this time Fink’s planes were already airborne.

The cancellation was radioed to the airplanes and the fighters received the message and turned back. The bombers didn’t get the message and pressed on. This despite the fact that one fighter pilot, seeing what was happening, flew in front of Fink’s Dornier gesticulating wildly, trying to send the message that the operation had been postponed.

The Dorniers bombed their target in Kent, but as they turned for home they were intercepted by British fighters. Unsupported by friendly Bf 109s, the Dorniers lost heavily.


The Action

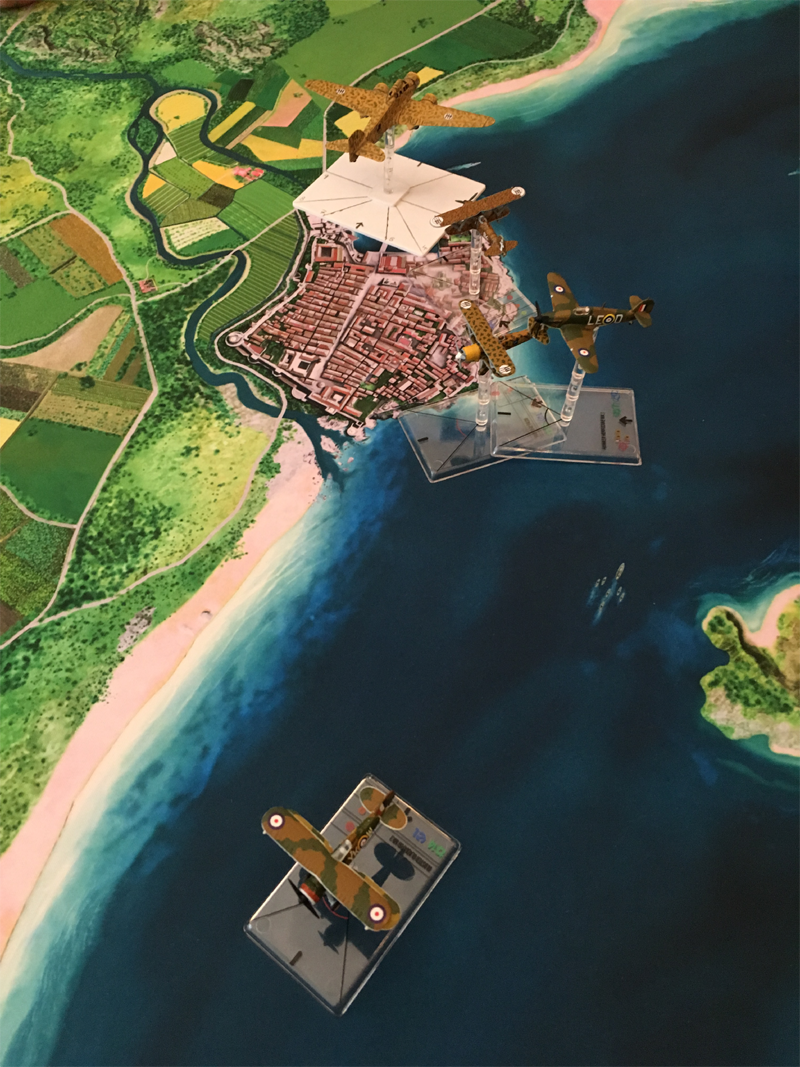
Having dropped their bombs on what they hoped was an armaments factory in the South of England, Leutnants Didi Schnell and Fritz von Spy und Spe where heading back to the continent. Their 109 escorts had disappeared when they crossed the French coast but the raid had gone well without them.

Pilot Officers Sir Price and Emmett Hollingberry were patrolling over Canterbury when the controller called them up and directed them towards a raid. Sir Price spotted the bandits and he and Hollingberry took their time working round to the bandits six.

Meanwhile Schnell and von Spy und Spe, with a cry of "Achtung Spitfire!", closed up their formation for better defensive fire.


With a shout of "Tally Ho", Sir Price opened fire damaging von Spy und Spe's Dornier but the return fire from both the Dorniers' rear-gunners caused black fumes to bellow out from Sir Price's engine.


When Oberleutnant Sepp Schlangenaugen and Leutnant Adolf Halland heard that the escort came back early, they jumped into their Bf 109s, determined to get the bombers home safely. When they spotted the bombers under attack over Kent, they raced towards the fight.


Before the Bf 109s could intervene, some lucky shooting caused Sir Price's engine to pack up. However with his parting shot, von Spy und Spe's Dornier caught fire.


Hollingberry took up the chase, picking on the already damaged Dornier.

Schlangenaugen and Halland were a little too eager to get into the fight, and quickly overshot Hollingberry's Spit.

This gave Hollingberry time for another burst, which did for von Spy und Spe.


The 109s turned on Hollingberry, but too slowly, so he managed to shoot down Didi Schnell as well.


Too late to save the bombers, the 109s caught up with Hollingberry and downed him over the Kent beaches.

Sir Price, with his dud engine, glided down over Kent and landed in a farmer's field. He received a cuddle from a dozen or so Land Girls before being taken to the farmhouse. The farmer, who had seen the fight above and the plummeting Dorniers, gave Sir Price a huge tot of his homemade Apple Brandy and then sent him off back to the airfield with a large parcel of bacon for the Officers' Mess.

Emmett Hollingberry ditched is plane in the channel, just a few dozen yards from Hastings Pier. Despite being injured in what could only be described as a crash, he managed to get out and swim ashore. He was immediately taken to the Novelty Rock Emporium by members of the home guard who gave him tea while waiting for the local ambulance to arrive. Hollingberry was now an Ace and while recovering from his injury went to The Palace to be awarded the DFC.

Fritz von Spy und Spe and his crew baled out over Kent, landed safely and before they could be discovered, made their way to the coast near Rye where they stole a fishing boat back to the continent.

Didi Schnell's Dornier crashed into the channel with no survivors.

Sepp Schlangenaugen and Adolf Halland flew back to France, where they celebrated Halland's kill with liberated Champagne. Halland was now a double Ace. He was awarded the Iron Cross, First Class and traveled to Karinhall to collect it from Göring himself.

Back at 369 Squadron's airfield, Foxy Moron the Intelligence Officer was in a flap, one of his paintings was missing, he was so busy searching for it that none of the pilots got debriefed. William ”Half Pint” Carruthers had been away on one day's leave, he returned late in the evening with a black eye, about which he would not talk. Sir Price smuggled a parcel into his quarters, but it went unnoticed, as the nosey Fitter Walker was away chauffeuring the wounded Cholmondeley Featherstonehaugh.

Result

Draw

  • Pilot Officer Emmett Hollingberry: 2 Kills. 
  • Leutnant Adolf Halland: 1 Kill. 
  • Leutnant Fritz von Spy und Spe: 1 Kill. 


Battle of Britain - Scenario 11 - August 12th 1940 – Destroy the Radar

This is the eleventh scenario in a Battle of Britain campaign that follows the exploits of the fictitious Country of Dampshire 369 Squadron Auxiliary Air Force. We use the Wings of Glory WW2 rules, slightly modified to give faster play, together with our own set of campaign rules. We use the Wings of Glory planes where the right model is available, other manufactures are used to fill in the gaps.

The Background

On the day before Adlertag, a first attempt was made to blind the RDF system, when German aircraft attacked four radar stations.

Operations targeted radar stations at Dunkirk, Dover, Rye and Pevensey. All were damaged and only Dunkirk remained on the air. In the afternoon Ventnor was seriously hit. However all stations were back on the air by the evening except Ventnor.

Back in Germany, the day’s raids were assessed as having been very successful. Wildly exaggerated estimates were made of the number of planes destroyed on the ground. A number of the airfields visited that day were duly crossed off as irreparably damaged. However, there was more realism concerning the radar stations. The Head of Signals reported that attacks had not put the radar stations out of action for long.


The Action

The Chief of Luftwaffe Signals, General von Vermouth, had identified the large towers on the coast of Britain as possible targets. These were to be knocked out before the offensive began in earnest. They made tricky targets, so it was decided to destroy them with precision dive-bombing. Oberleutnant Hans von und zu Missendorff was tasked with the mission which he decided to fly together with the newcomer to the squadron Leutnant Didi Schnell. Missendorff was unhappy flying the slow Stukas when opposition from Spitfires could be expected so he asked Oberleutnant Sepp Schlangenaugen and Leutnant Adolf Halland would fly close escort in their Messerschmitt Bf 109 E-4s.

Pilot Officers Cholmondeley Featherstonehaugh and Emmett Hollingberry were lounging in deck chairs near their Spitfire Mk IIs when they heard the ready room telephone ring. An incoming raid was detected by RDF and two of 369 Squadron's fighters were to intercept before they reached the coast.

The Huns crossed the French coast in tight formation and then the Bf 109s sped ahead of the Stukas in order to deter defending RAF fighters.


Cholmondeley Featherstonehaugh and Emmett Hollingberry confused the Huns by splitting, in a manoeuvre which could be likened to the formation display teams in their Bulldogs ten years earlier. This trick allowed Featherstonehaugh and Hollingberry a first pass at the Stukas without the 109s interfering.

The 109s turned back to rescue the Stukas and started to dogfight with the Spits, but Featherstonehaugh stuck doggedly to the tail of "his" Stuka pouring burst after bust of .303 bullets into the Hun.


This left Hollingberry in an uneven fight with two 109s and he was soon on fire and going down.


Featherstonehaugh was in trouble, despite emptying all 2,800 of his .303 rounds into the Stuka it seemed to be flying on without problems. Then a lucky shot from Missendorf's rear-gunner caused Featherstonehaugh's engine to start making funny noises and loose power. To add injury to insult, the next burst from the Stuka wounded Featherstonehaugh who decided that discretion really was the better part of valour, at least with this Stuka which seemed unstoppable.

The Stukas arrived at the masts and dives so steeply that Featherstonehaugh lost contact. One Stuka as if by magic popped out of the dive just behind Featherstonehaugh and gave him a burst of fire to help him on his way home.


Back home, both Stukas claimed direct hits on the masts, but they were in fact only near misses and the station was still in operation.

Featherstonehaugh was patched up by the station doctor and sent on a few days leave to recover. He couldn't drive, so Leading Aircraftman Walker was shanghaied into acting as his driver. As they drove away, his squadron mates could hear Featherstonehaugh's morphine induced ramblings "What-ho the RAF! Bloody 303s! I'll kill that chappy Browning if I get my hands on him! Just not up to snuff! American's can't get anything right! I need bigger! Much bigger! Cannons! Right ho! Explosive! Bang! Bang! Bang ..."

Result

German Victory

  • Leutnant Adolf Halland: 1 Kill. 

Battle of Britain - Scenario 10 - August 7th, 1940 – Leader of the Free French

This is the tenth scenario in a Battle of Britain campaign that follows the exploits of the fictitious Country of Dampshire 369 Squadron Auxiliary Air Force. We use the Wings of Glory WW2 rules, slightly modified to give faster play, together with our own set of campaign rules. We use the Wings of Glory planes where the right model is available, other manufactures are used to fill in the gaps.

The Background

Générale de Gaulle flew from France on 17th June and landed at Heston Airport. He visited Churchill at Number 10 Downing Street and discussed making a radio broadcast. The following day, De Gaulle broadcast an appeal which exhorted the French people not to be demoralized and to continue to resist the occupation of France.

The Vichy regime had already sentenced de Gaulle to four years imprisonment; on 2nd August he was condemned him to death by court martial in absentia.

De Gaulle and Churchill reached agreement on 7th August, that Britain would fund the Free French, with the bill to be settled after the war. A separate letter guaranteed the territorial integrity of the French Empire.

Having reached agreement, it could have been possible that Churchill invited de Gaulle and the American Ambassador "Joe" Kennedy to dine with him that evening at Chequers.


The Action

Information from a French spy in England had informed the Abwehr of the proposed meeting between Chirchill and de Gaulle. The Abwehr in turn informed the Luftwaffe who planned a raid on Chequers. It was to be a small raid, that could hopefully sneak through without being detected by RAF fighters. Because of the distance, it could not have fighter escort for the whole journey; fighters would escort the bombers to the limit of their endurance and new fighters would meet up with the bombers on their way out. Two Heinkel He 111 bombers would perform the raid escorted by two Messerschmitt Bf 109 E-4s. Oberleutnant Sepp Schlangenaugen and Leutnant Adolf Halland would fly the first escort.

The incoming raid was detected by RDF and a telephone call was put through to 369 Squadron. Two Hurricane Mk IIs were scrambled flown by Pilot Officers Cholmondeley Featherstonehaugh and Sir Price.

Having been warned in good time, the Hurricanes met the raiders while they we still over the channel. The Hurricnes, led by Sir Price, attacked directly.


The 109s were slow in responding, and the Hurricanes made a head on pass through the Heinkels before the 109s could come to their defense.


A close range burst from Featherstonehaugh set an engine of one of the Heinkels on fire. Both Heinkels forged ahead as quickly as possible, while a dogfight between the 109s and the Hurricanes broke out behind them.


The dogfight gave the Heinkels enogh time to get clear. All the fighters took damage but a lucky deflection shot from Schlangenaugen caused Sir Price's Hurricane to catch fire and was last seen diving away in flames. A kill for Schlangenaugen.

The Germans were running low on fuel so they headed for France. Featherstonehaugh had lost sight of the bombers, so he nursed his damaged Hurricane back to base.

Sir Price managed to crash land his flaming Hurricane in a farmer's field. He decided that his previous crashes in the cold waters of the channel should have been appreciated more, compared to this hot escape.

When the controllers heard that the Heinkels had escaped they contacted 369 Squadron again, and scrambled another pair of Hurricanes. Flying Officer William ”Half Pint” Carruthers and Sous-lieutenant Napoleon Schickelgrüber took off in chase of the bombers. Napoleon Schickelgrüber, an Armée de l'Air fighter pilot, had recently arrived in England after fleeing occupied France.

They caught up with the Heinkels and picked one target each. Half Pint got on the tail of his Heinkel and shot it down just as it was lining up for its bomb run on Chequers.

Napoleon Schickelgrüber was slower and just as he was turning on his Heinkel he was damaged by defensive fire causing him engine trouble.


The remaining Heinkel, worried by the presence of the Hurricanes, made a quick bomb rum on Chequers.

Most of the bombload misses the target but one bomb lands on the terrace and bounces through the dining room window landing on the floor next to the dining room table. Churchill’s bodyguard, Detective Inspector Walter Henry Thompson, dives on top of the bomb to protect the Prime Minister from the blast. After a very very long 15 seconds – nothing has happened. Thompson gets up to the applause Winston and his guests, dusts himself down and throws the bomb back out the window. Where it of course explodes, destroying the dove cote, and providing the guard house with a good dinner.


Half Pint tenaciously chased the remaining Heinkel and shoots it down as it turned for home.

Napoleon Schickelgrüber heads for home nursing his stricken engine. Leading Aircraftman Walker, a fitter, looks over the Hurricane's engine but claims he could find nothing wrong with it. Shouts of "le roast bœuf incompétent" and "bloody frogs" could be heard coming from the hanger, although they did not disturb the partying in the Officers' Mess.

Half Pint returns to base to be feted in the Officers' Mess. Squadron Leader Foxy Moron, the Intelligence Officer, rewards Half Pint with a glass of Pastis while being debriefed. With his attention elsewhere, Foxy’s troublesome dog relieves himself in Half Pint's flying boots.

Result

British Victory

  • Flying Officer William ”Half Pint” Carruthers: 2 Kills. 
  • Oberleutnant Sepp Schlangenaugen: 1 Kill. 

Notes

The chateaux we used to represent Chequers came from Irregular Miniatures 2mm range.

Sunday, July 8, 2018

Battle for Malta - Scenario 6 - Bomb the Grand Harbour

This is the sixth scenario in a Battle for Malta campaign after which we will take a break for summer holidays. The campaign follows the exploits of the Country of Dampshire 369 Squadron Auxiliary Air Force fighting against the Regia Aeronautica squadriglia d'aquila - two fictitious squadrons. We use the Wings of Glory WW2 rules, slightly modified to give faster play. We use the Wings of Glory planes where the right model is available, other manufactures are used to fill in the gaps.

We use our own set of campaign rules "Wings Over Malta". These contain 6 basic missions which will be played with alternate sides as the attacker. They will be played first with "early war" planes and then repeated with "late war planes". This differs from our previous Battle of Britain campaign which was a ladder campaign that followed more exactly the historical battle.

The Background

Over Malta, the CR.42 encountered Hurricanes for the first time on 3 July 1940. That day, Flying Officer Waters shot down a Savoia-Marchetti SM.79 Sparviero (Sparrowhawk) bomber five miles off Kalafrana, but he was soon attacked in turn by the escorting Fiat CR.42 Falchi who badly shot up his aircraft. Waters crashed on landing and his Hurricane was written off. The Hurricane pilots soon discovered that the Italian biplanes could easily outmaneuver their aircraft.

Pilot Officer Jock Barber remembered: "On my first combat, the 9 of July, I attacked the leader of a Squadriglia of Falcos, while Flight Lieutenant George Burges attacked an SM.79 bomber. When I shot the CR.42 at a range of 100 yards, he did a flick-roll and went spinning down. I found myself engaged in dogfighting with the remaining CR.42s. This went down to about 10,000 feet; by then I had used up all my ammunition without much success, although I am convinced I got quite a few strikes on the leader in the initial combat. I realized pretty quickly that dogfighting with biplanes was just not on. They were so manoeuvrable that it was very difficult to get in a shot, and I had to keep diving and turning to keep myself from being shot down. George had by this time disappeared so I stuck my nose down and, with full throttle, was very thankful to get out of the way."


The Action

Pilot Officer Sir Price had escaped from his Italian captors and was smuggled through France and Spain to Gibraltar. On The Rock he boarded an aircraft carrier on its way to resupply Malta. On deck were a few old but precious Hawker Hurricane Mk.I's destined to be flown off at maximum range to reinforce the RAF on Malta. Sir Price was given one of these Hurricanes.

Sir Price had just landed at Luqa, his Hurricane was being refuelled when a telephone call announced that RDF had detected incoming bandits heading toward the Grand Harbour.

Cholmondeley Featherstonehaugh ran and jumped into his waiting Gloster Gladiator and took off. Sir Price grabbed a bacon sandwich ran to his Hurricane and followed Cholmondeley into the air.

The bandits that had been detected on RDF were a four-plane formation from the Regia Aeronautica's squadriglia d'aquila led by Capitano Vitello Tonnato. It consisted of two Savoia-Marchetti SM.79 Sparviero (Sparrowhawk) bombers escorted by a pair of Fiat Cr.42 Falco (Falcon) fighters in close formation.


As the italians approached Malta, Cholmondeley Featherstonehaugh was already out over the sea waiting for them. Sir Price was catching up fast, but he was still over the harbour.


Cholmondeley shouted "Tally Ho" and headed his Gladiator at the two CR.42 fighters in the hope od distracting them. Sir Price, still a fair distance away, headed for the bombers in the hope that his eight machine-guns would do good work.

Capitano Vitello Tonnato signalled his wingman Tenente Vittorio Gambetta to climb in order to avoid the risk of collision.


Cholmondeley turned in, taking the Falcons by surpise and got of a good burst into one of the. Sir Price and the bombers continued to close.


Primo Tenente Silvio Machette turned the bombers away from the attacking British fighters, perhaps in the hope that his rear gunners would get a good shot. This didn't worry Sir Price who continued to close the distance.

Tonnato and Gambetta turned their CR.42's tightly and managed to get a burst into Cholmondeley which wounded him.


Primo Tenente Silvio Machette climbed his Sparviero and ordered Sottotenente Modena Maserati to tighten the formation.

Cholmondeley performed a sharp turn and opened fire on Maserati's Sparviero, a lucky shot which caused flames to start pouring out from the bomber.


The bombers turned back again towards the hatbour. Cholmondeley continued his attack on Maserati's Sparviero and Sir Price headed in to help him despite the two Italian fighters which opened fire on him.


Sir Price continued his attack on Maserati's Sparviero. In a poorly judged turn, Tenente Vittorio Gambetta ended up in front of Cholmondeley's guns.


Sir Price continued his attack on Maserati's Sparviero, but the return fire from Maserati's rear gunner caused smoke to erupt from Sir Price's Hurricane. Cholmondeley mixes it up with the CR.42's.


The bomber continued towards their target followed by a gaggle of enemy and friendly fighters.


Both British fighters opened fire on Sottotenente Modena Maserati's already flaming Sparviero bomber which couldn't take the punishment any more. Primo Tenente Silvio Machette conitinued with the mission, pointing his Sparviero bomber at the target.


Silvio Machette conitinued with the mission heading towards the target. The fighters behind him tried to sort themselves out.


Silvio Machette lined up on the target ready to bomb. The dogfight behind him continued.


Bombs away!

Cholmondeley's Gladiator had taken a real beating, so he turned away out of the fight.


Cholmondeley had had enough. Having dropped his bombs on target, Silvio Machette turned his Sparviero bomber for home. Sir Price placed his Hurricane behind Vittorio Gambetta's CR.42 and opened fire with his eight machine guns.


Vittorio Gambetta's CR.42 disintergrated under the hail of fire from Sir Price's eight machine guns.


Sir Price was satisfied with his kills; his Hurricane was badly damaged, so he followed Cholmondeley homeward. Tonnato's slow CR.42 couldn't catch a Hurricane even if he'd wanted to, so he escorted the bomber home.

Result

British Victory

  • Sottotenente Modena Maserati: KIA
  • Tenente Vittorio Gambetta: POW
  • Pilot Officer Sir Price: 1½ Kills
  • Cholmondeley Featherstonehaugh: ½ Kill

Campaign Result so far...

2 Country of Dampshire 369 Squadron Auxiliary Air Force
4 Regia Aeronautica squadriglia d'aquila

Notes

ARES has no Savoia-Marchetti SM.79 Sparviero (Sparrowhawk) bombers so we used the ones from Armaments in Miniature (AIM).