Showing posts with label Napoleonic. Show all posts

Friday, July 3, 2026

Battle of Ocaña (19 November 1809)

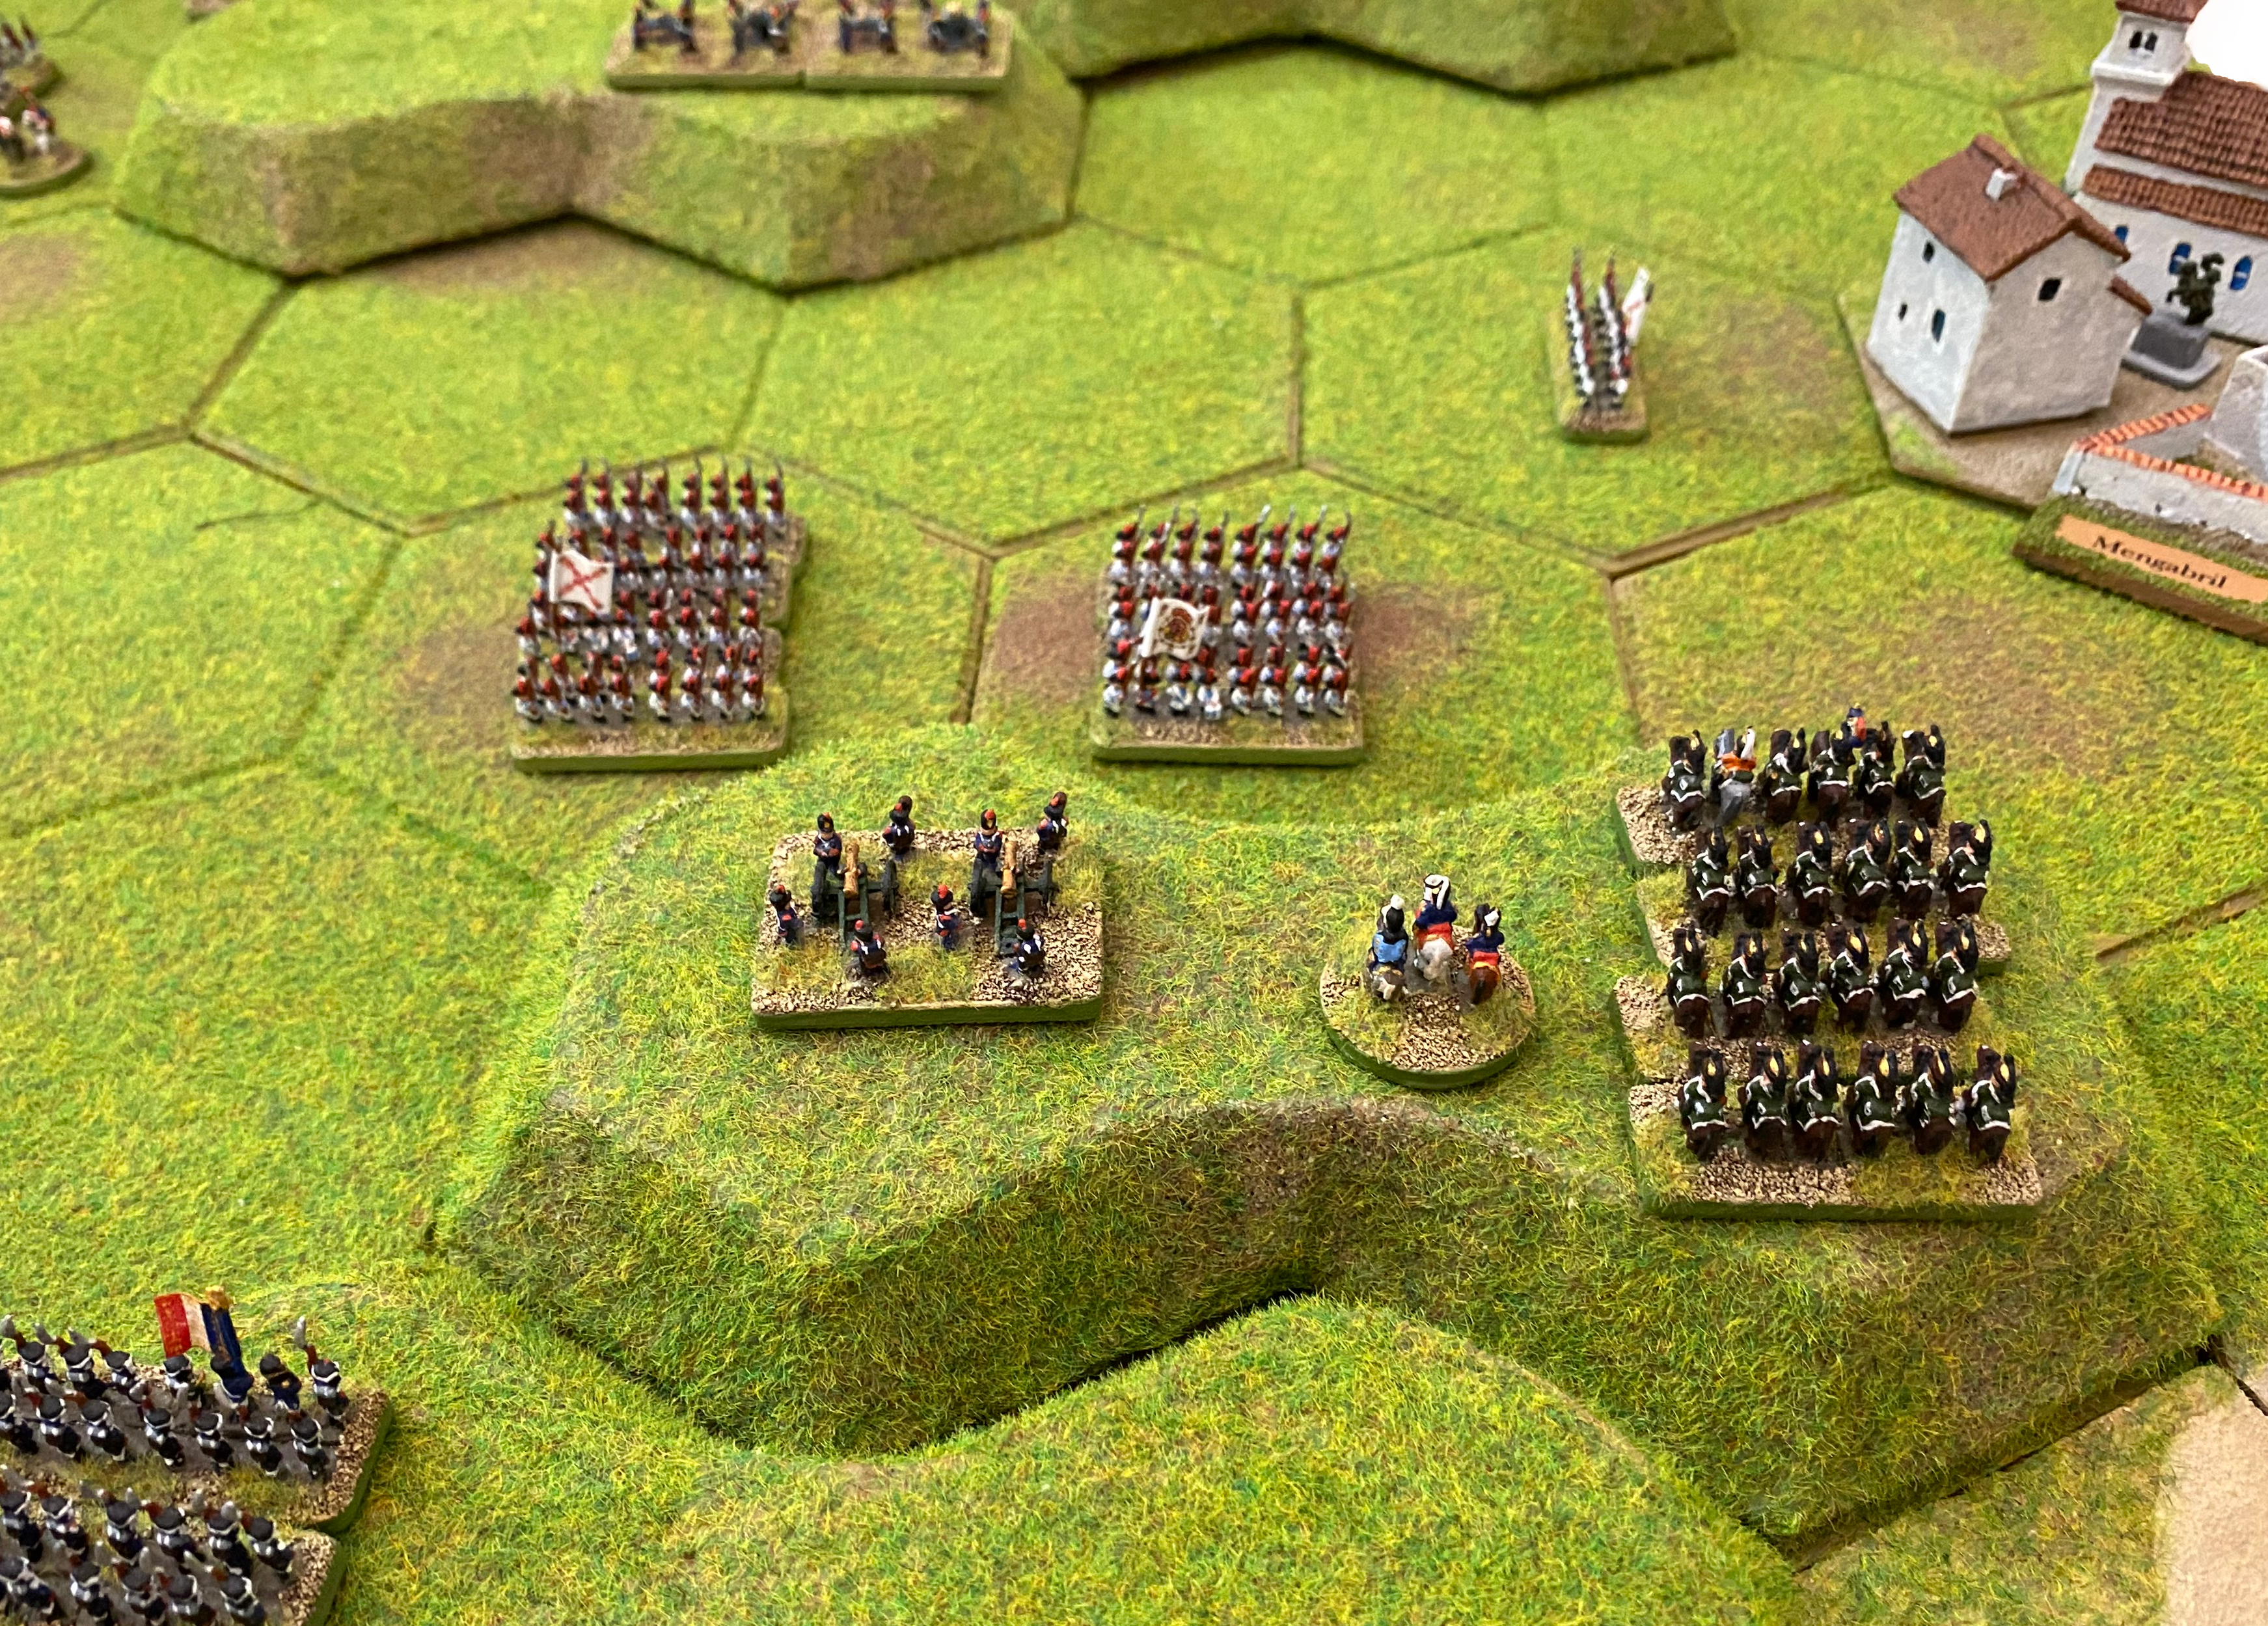
Refight of the Battle of Ocaña, 19th November 1809, using Commands & Colors Napoleonic Rules. Figures from Baccus 6mm range, hex terrain from Kallistra, houses from TBM and trees from Timecast.

Although the Battle of Ocaña is without a doubt the French army's greatest victory in Spain, it has been rarely written about. As a matter of national pride, Spanish historians could hardly be expected to tackle the subject. From a French point of view, the wars were Napoleonic, and as Napoleon wasn't present there was little interest. As for the British, they neglected the battle as none of their troops were present.  There is now however, an interesting work in English covering the battle: “The Battle Of Ocaña – the Army of Spain’s Greatest Victory by Pierre Juhel".


The History:

The Spanish campaign of fall 1809 was unfolding successfully. The subsidiary Army of the Left had beaten the French at Tamames. Now the 55,000 man Army of La Mancha commanded by Juan de Aréizaga was a mere 35 miles from Madrid. The French were reacting quickly and soon assembled over 30,000 troops, with more approaching to cut off the Spaniards. Aréizaga realized the threat and began to fall back, but not quickly enough. The French army, under the tactical command of Marshal Soult, brought the Spanish army to bay near the village of Ocaña where it deployed in terrain unfavourable for the defence. The Spanish centre and right were formed on an open plain – excellent terrain for the French cavalry. On the 19th Soult ordered Sebastiani to attack the Spanish right flank infantry with his German and Polish divisions. When the infantry was fully engaged, Milhaud’s French cavalry attacked Freire’s cavalry, severely battered in the previous day’s cavalry battle, and quickly routed the Spanish horse. Meanwhile the Spanish were funnelling reinforcements to the right and began to press back Sebastiani’s troops. The Spanish advantage was only temporary. Soon the victorious French cavalry, including the feared diablos Polacos (the Polish Vistula Legion lancers), fell upon the rear of the Spanish right flank infantry. In minutes three Spanish divisions ceased to exist.

Marshal Soult advanced infantry on the newly exposed Spanish center divisions, pinning them in place. Soon the French cavalry descended on these troops too, scattering them to the wind. Dessolles’ division then stormed Ocaña, and all remaining Spanish formations fled except for Zayas’ division. It attempted to cover the Spanish retreat, and retained its formation for several miles, but it too collapsed later in the day to a French cavalry pursuit that could not be stopped. Over 5,000 Spaniards were casualties and another 14,000 were captured, along with virtually all of the army’s artillery.


The Setup:

The armies deployed on what was basically an open plain in front of the village of Ocaña,


The view from the Spanish commander's lines:

The village of Ocaña, heavily defended by Spanish infantry. Houses are TBM and the statue is a Baccus SYW general.


The Refight:

The battle started with some infantry skirmishing on the French left flank.

The French commander then ordered an assault on his left flank with the primary objective to eliminate the Spanish right flank cavalry and a secondary objective to attack the Spanish infantry.

The Polish lancers first rode down and eliminated the Spanish Dragoons and then broke through and charged into the Spanish light cavalry eliminating them too.

This left the French dragoons free to attach the Spanish line infantry. They decided not to form square, which proved to be a fatal mistake.

The advancing French infantry were less successful, exchanged volleys and casualties with the Spanish light infantry.

Polish Vistula Legion lancers charging the Spanish Regimiento de Dragones de Almansa

The French commander then ordered a Cavalry Charge. The Spanish guerrillas tried to intercept the order but were cut down with sabres in the attempt.

The French dragoons charged the Spanish infantry who formed square with both sides taking casualties.

The Polish Lancers destroyed the Spanish artillery and forced the Spanish Grenadiers behind them to also form square.

«Los Diablos Polacos» The Polish Devils were living up to their nickname, as their charged and wiped out the Spanish artillery.

With 3 infantry units now in squares, the Spanish commander was greatly limited in his ability to manoeuvre. 

While the French dragoons kept the Spanish infantry in squares, the French line and light infantry moved forward to support the Polish lancers. Now the artillery could come into play, supporting the lancers and infantry in combined arms attacks. The Spanish grenadiers in square were the first target of this tactic.

The whole Spanish right wing was decimated.

The troops holding Ocaña and those in reserve, were so dispirited and demoralised by the speed of their right wing's slaughter, that they had no desire to stand and remain in the fight.  

This resulted in a 6-0 victory to the French.


Saturday, April 6, 2024

Quatre Bras (16 June 1815)

This scenario is a refight of the Battle of Quatre Bras (16 June 1815) during the Hundred Days. It was played using the Commands & Colors Napolionic rules but on hex terrain from Kallistra, buildings from Total Battle Miniatures, trees mostly from Timecast and using 6mm figures from Baccus instead of blocks. 


The History

Napoleon Bonaparte’s surprise march placed his army squarely between Blucher’s Prussians at Ligny and Wellington’s Anglo-Allied army assembling around Brussels. Napoleon concentrated most of his strength against Blucher, but ordered Ney and the II Corps to capture the vital crossroads of Quatre Bras to deny Wellington the chance to reinforce Blucher. Ney procrastinated and his attack did not get underway until two in the afternoon. The delay allowed Wellington to bring fresh allied troops to support the Dutch-Belgians and the Nassau Brigade that were thinly deployed south of the crossroads.

The initial French advance was greeted with musket volleys, but the outnumbered Allied troops were forced back. The Allied units in the wood, however, managed to hold. Facing three infantry divisions and a cavalry brigade, the Allied situation was fast becoming desperate, but additional troops kept arriving and Wellington, now in command, directed them to key positions on the battlefield.

Ney realized that the numerical balance was shifting in favour of the Anglo-Allies and that he could only capture and hold Quatre Bras by a desperate move. He ordered General Kellermann to lead his cuirassier brigades forward and break through Wellington’s line. The cuirassiers managed to reach the crossroads, but were driven back by close range artillery and musket fire. The arrival of the British Guards Division late in the day gave Wellington sufficient strength to launch a counter-attack that forced the French to give up all of their hard fought territorial gains.

This scenario (available here) is an alternative to the original Quatre Bras 014 scenario. It was inspired by William Barnes Wollen's painting of the battle "Black Watch at Bay" which shows the Black Watch Highlanders surrounded by French lancers. However the original scenario had neither the Black Watch nor any lancers. This scenario adds a unit of French lancers and upgrades one of Picton's British Line Infantry units to "Grenadier" to represent the Highlanders. Kellermann's Cuirassiers and Cooke's Foot Guards are no longer available at the start of the battle, they arrive on the marked hexes when a unit crosses the stream.


The Refight

Instead of advancing, the French held their positions and opened fire on the Allies. This caused artillery casualties on their left (in the Bossu Wood) and infantry casualties on their right (on the hill). However the artillery fire in the centre had no noticeable effect.

The Allies send out a coordinated set of orders, the infantry in the centre under the command of the Prince of Orange was to withdraw behind the hill out of the French artillery's field of fire.

At the same time, the artillery on both Allied flanks, opened up with a intense but ineffective fire.

Seeing the Dutch-Belgian infantry retreating from the ridgeline, Marshal Ney ordered two units of line infantry to probe forwards and start crossing the stream.

Seeing the French start probing the centre, General Perponcher on the Allied right, decided to start skirmishing with his Nassau light infantry in the hope of distracting the French commander, Fire from the Nassauers caused casualties in the opposing French light infantry.

Ignoring the annoying Nassau skirmishers on his left, Marshal Ney ordered the infantry columns in the centre to perform a bayonet charge and take the opposing ridge.

The two French columns on the left of the ridge, wiped out the defending Brunswick infantry with only slight losses to themselves and advanced up onto the ridge.

The two French columns on the right of the ridge, attacked the two Dutch-Belgian infantry units under the command of the Prince of Orange. The first Dutch-Belgian infantry lost most of its effective strength and retreated through the village of Quatre Bras and reformed in safety behind it. The second Dutch-Belgian infantry, with the Prince of Orange at its head was wiped out. The Prince had a lucky escape and fled to the Dutch Hussars who were waiting in reserve.

At this time Marshal Ney was pleased to be informed that the Cuirassiers of General Kellermann could be seen entering the battlefield. However he could even see a dust cloud on the road leading north from Quatre Bras, a sign the Cooke's British Guards would soon be in action.

Seeing the French had captured the ridge, the British Guards followed by their artillery battery, attacked immediately. Their withering fire caused a French column to retreat back off the ridge having taken 50% casualties.

Marshal Ney sent a scout to General Kellermann, ordering him to bring up half of his Cuirassiers to counter the treat posed by the British Guards.

In order to give the Guards time to advance and deploy for the fight, the Prince of Orange ordered a cavalry charge. With himself at the head of the Dutch hussars, and accompanied by the Brunswick Hussars they charged at the French columns on the hill.

The French infantry formed squares as they saw the advancing cavalry. The Brunswick hussars charge failed and they retired into Quatre Bras. The Dutch hussars, with the Prince of Orange at their head caused light casualties on the French square which held firm.

Marshel Ney ordered Kellermann and his Cuirassiers forward in support of the square and restrict the Allied cavalry while ordering the infantry unit which had be shot up by the British Guards to retire.

On their left flank, the French infantry had started to occupy the Bossu wood. On their right flank, the infantry had advanced to the stream under the covering fire of their artillery battery which wiped out the Dutch-Belgian infantry that was on the front slope of the hill opposite.

The British ordered forward Picton's division to support their allies and Cooke's Guards to continue their attack on the ridge. The Guards firepower decimated the French square on the hill. At the same time, the Brunswick infantry in the Bossu wood opened fire on the French infantry that were already retiring away from the Guards.

The situation on the ridge was looking dire for the French, so Marshal Ney ordered a cavalry charge. Kellermann with his Cuirassiers was to charge over the hill and drive off the Dutch hussars who were still threatening the French infantry in square. The other French cavalry was to advance so as to be in support later.

Advancing at a trot over the hill, the armoured Cuirassiers crashed into the flank of the Dutch Hussars and annihilated them. The Prince of Orange was forced to flee to the safety of The Brunswick Hussars in Quatre Bras.

Without slowing at all, Kellermann and his Cuirassiers continued their attack and fell upon Picton's unsuspecting artillery, even they were wiped out.

The Alies held their position and opened fire which eliminated the French squares on the ridge,

The French centre renewed the assault. 

On the left the Cuirassiers attacked the Dutch-Belgian artillery on the hill. The artillery was destroyed and the Cuirassiers advanced down the rear slope but stopped before attacking Picton and his British Line Infantry.

On the left the French Hussars and Lancers attacked the British Guard infantry. The Guards were confident and didn't form square. They were hit first by the lancers and then by the hussars. This combined attack was so successful, that it destroyed the Guards with loss.

Through a gap between the Bossu wood and the other Guard unit, the Hussars saw an artillery battery. Leaving the lancers behind to mop up the infantry, the Hussars charged. The artillery took minor casualties but the Hussars took heavy casualties from short range canister shot and were forced to retreat.

At the head of the Brunswick Hussars, the Prince of Orange attacked the retreating French Hussars and eliminated them.

Marshal Ney ordered a final assault in the centre. The Cuirassiers attacked the Brunswick Hussars, The Lancers occupied the Quatre Bras crossroads. Two units of line infantry retook the ridge.

The lancers decided that it was best to secure the Quatre Bras village and crossroads, and thus making reinforcing Blucher difficult for Wellington, rather then attacking the understrength Dutch-Belgian infantry who could be troublesome if they formed square.

Both the French infantry units open fire on the British Guards, and both caused casualties.

The Cuirassiers had artillery support when they charged into the Prince of Orange and his Brunswick Hussars. The hussars were wiped out. Having had a third unit wiped out with him at their head, the Prince of Orange was captured by the Cuirassiers.

The Cuirassiers continued their advance, but were brought to a halt when the British Guards formed square. The cuirassiers couldn't break the square, and the Guards' musket balls just bounced of the Cuirassiers' armour.

As darkness fell, Wellington withdrew his troops northwards, towards Genappe and then the field of Waterloo.

The Prince of Orange had survived, despite having had one brigade of infantry and two of cavalry wiped out with him at their head. That evening, Marshal Ney celebrated his victory and the capture of the Prince of Orange by inviting him to dine at the Gémioncourt farm just south of Quatre Bras. 

That same evening, the Duke of Wellington celebrated the capture of the Prince of Orange, knowing that Colonel Ompteda and his KGL Line Infantry would not be annihilated in two days' time at La Haye Sainte farm.

The Outcome 

French Victory:   French 9  -  Anglo-Allies 4 


Monday, March 18, 2024

Medellín (28 March 1809)

This scenario is a refight of the Battle of Medellín (28 March 1809) during the Peninsular War. It was played using the Commands & Colors Napolionic rules but on hex terrain from Kallistra, buildings from Total Battle Miniatures and using 6mm figures from Baccus instead of blocks.


The History

After being forced out of its defensive positions on the River Tagus, General Don Gregorio Garcia de la Cuesta’s Spanish army was retreating in the face of Marshal Victor’s advancing French army. On the 27th of March, Cuesta’s army was reinforced by the Duke of Albuquerque, and Cuesta decided it was time to fight. Cuesta’s plan was to strike both French wings and hope to catch the French army with their backs to the Guadiana River. Victor was outnumbered, but had veteran troops who knew how to win, so he willingly deployed for battle. Victor’s plan was to keep withdrawing his flanks closer and closer to the center until a powerful counter-attack could shatter the Spanish line.

Cuesta formed his infantry into one long, thin unbroken line since his greatest fear was that French cavalry could destroy his infantry if there were gaps in the line. At first, Cuesta’s plan seemed to be working. Lasalle’s position on the French left was at risk, but his men held on to their tenuous positions. Spanish infantry formations were also pushing forward against the French batteries on Latour-Maubourg’s hill position. Latour-Maubourg flung his cavalry into a counter attack, but the cavalry was forced into a disorganized retreat. As the Spanish infantry threatened to capture the French guns, Latour-Maubourg ordered his reformed cavalry to attack again – this time against the Spanish cavalry covering the end of the infantry line. Events now unfolded quickly. The French cavalry charge succeeded and the Spanish cavalry fled the field, exposing the thin Spanish line to a devastating flank attack. Cuesta’s left flank dissolved in panic. Lasalle and Villatte, seeing the opportunity, ordered a counter-attack that caught the right flank of the Spanish army between infantry to their front and cavalry to their flanks and rear.

The result was a massacre. Entire battalions were destroyed as they tried to stand and fight, and the French cavalry showed no quarter in their pursuit of fugitives. Over 7,500 Spaniards became casualties. In the aftermath, Cuesta’s shattered army retreated to Monasterio.


The Refight

The Spanish started the battle by repositioning their infantry on the central ridge to make room for a battery of foot artillery, moving forward so as to be in a good position to bombard the French.

Marshal Victor ordered La Grande Manoeuvre and moved his left flank over to face the Spanish centre. By doing so, he got his troops out of a tricky situation, as they had had their backs to the unfordable Guadiana River.

General Don Gregorio Garcia de la Cuesta ordered both his flanks forward.

On his left, Spanish line infantry and Heavy Dragoons advanced. Perhaps hoping to surprise the French right, or perhaps just to secure the town of Mengabril.

While on the Spanish right, the troops moved towards the centre, to mirror the French manoeuvre.

Marshal Victor ordered his right flank to assault the advancing Spanish. General Latour-Maubourg took command of the Dragoons, and supported by their horse artillery, they attacked the Spanish Dragoons. While French infantry advanced to fill the gap they had left in the line.

Charging down the hill, with the supporting cannon fire from their horse artillery, Latour-Maubourg's Dragoons wiped out their Spanish counterparts.

The Spanish Force Marched their left wing infantry commanded by Brigadier Juan Henestrosa to oppose the advance of the French right wing.

Marshal Victor was about to order his troops forward, however troublesome Spanish Guerrillas delayed his chief of staff from sending out the command.

Taking advantage of the apparent hesitation of the French, General Cuesta ordered his left flank to attack.

Musket fire from the Spanish line infantry caused severe losses to the French horse artillery causing it to retire behind the crest of the hill.

However the Spanish infantry's attack on the French Dragoons was less successful, resulting in heavy losses for the Spanish infantry and the death of Brigadier Juan Henestrosa and no noticeable effect on the French.

The French centre was ordered to attack. One light cavalry unit charged a Spanish infantry unit and a second light cavalry unit moved up in support.

The Spanish infantry formed square, creating a temporary stand-off.

Showing inspired leadership, General Trias led his Spanish infantry unit through the valley between the hills in order to attack and push back the French cavalry.

On the French right, the horse artillry advanced again and the Dragoons attacked the Spanish infantry in front of the town of Mengabril, The Spanish infantry formed square, repulsing the Dragoons.

Seeing the success of their comrades, the remaining Spanish infantry attacked the French on the hill.

The first attacking Spanish line infantry column was repulsed by the French horse artillery, causing it to retreat back to the ridge after taking losses. The second attacking column caused the French artillery to retire behind the crest of the hill, but did not follow up its victory.

The French ordered their centre to attack. Two units of light cavalry rode forward to attack the Spanish positions.

When the cavalry attack was over, one cavalry unit was destroyed and one had retired. However both Spanish line infantry units had severe losses.

Back on their left flank, the Spanish infantry climbed up the hill and attacked the French horse artillery.

The horse artillery was destroyed.

The Spanish light cavalry advanced, causing the French light cavalry to retreat to their own lines having taken severe losses.

On the French right, the dragoons advanced to attack the Spanish artillery while a line infantry column advanced over the crest of the hill.

The dragoons rode passed the decimated Spanish square, which the line infantry opened fire on and destroyed.

The dragoons attacked the artillery on the hill.

General Latour-Maubourg and his dragoons caused serious casualties and only a few surviving Spanish artillerymen managed to retreat.

The dragoons followed up the attack and overran the few surviving Spanish artillerymen.

General Latour-Maubourg and his victorious French Heavy Dragoons...

Having taken heavy losses, and their left flank turned by the French heavy cavalry, the whole Spanish army gave up the battle and started to fade away and head for the sierras.


The Outcome 

Spanish Victory:   Spanish 6 - French 3