Sunday, July 9, 2023

Zornoza (31 October 1808)

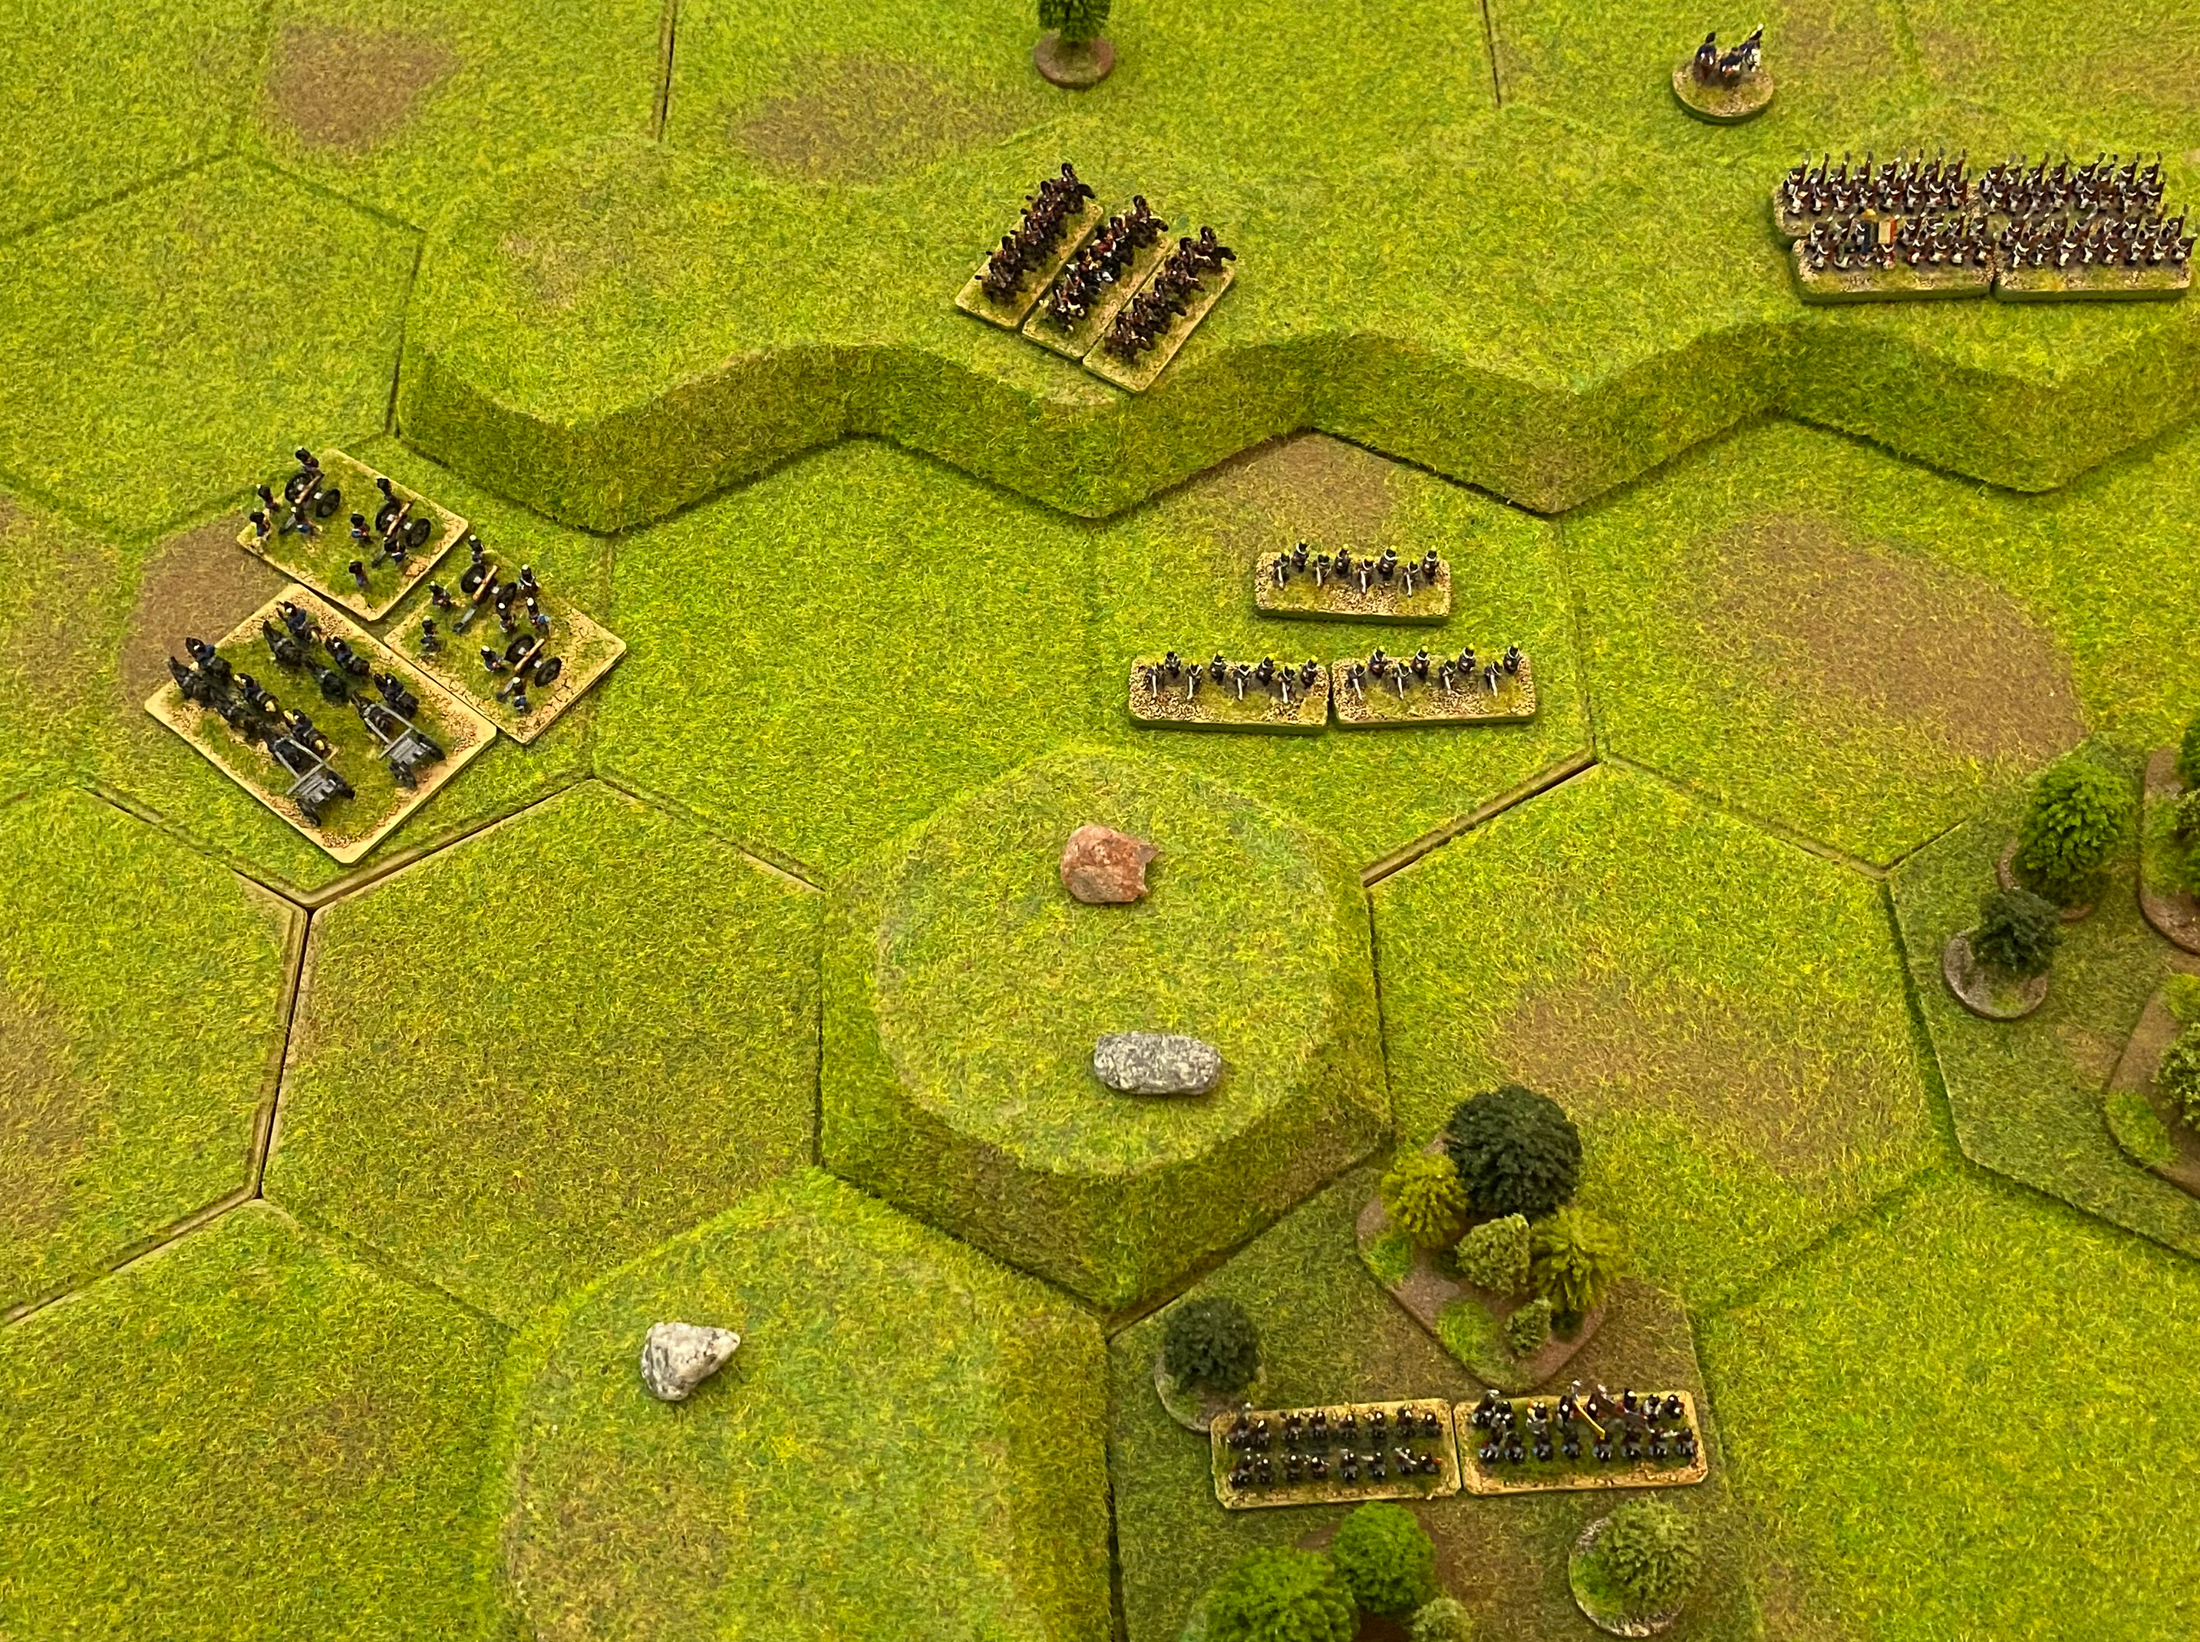
This scenario is a refight of the Battle of Zornoza (31 October1808) during the Peninsular War. It was played using the Commands & Colors Napolionic rules but on hex terrain from Kallistra, trees mostly from Timecast Miniatures and using 6mm figures from Baccus instead of blocks. This is the fifth battle using our Peninsular War campaign rules.


The History

The Dos de Mayo Uprising had put Iberia in revolt against French rule and the first French invasion of Spain had ended in failure. The Spanish, without a functioning high command, failed to coordinate an advance by the closest Spanish armies to take advantage of the temporary weakness of the French position behind the Ebro River. French Marshals Bessières, Victor and Ney, knowing that Napoleon was on his way, chose not to act. 

Marshal François Joseph Lefebvre, hungry for glory, observed that Lieutenant General Joaquín Blake y Joyes’s Spanish ‘Army of the Left’ was vulnerable to attack. On October 31st Lefebvre launched a ferocious three-pronged attack on Blake’s army as it was drawn up in front of Zornoza on a range of low hills. 

At first the entire Spanish line retreated to the heights of San Martín, but soon afterward, the Spanish center disintegrated. Blake reacted quickly, and ordered his two wings to retire and cover his center. Blake’s army then retreated in good order. 

Lefebvre’s premature attack at Zornoza, coupled with Blake’s rapid retreat, compromised the northern part of Napoleon’s plan for a grand double envelopment of the Spanish armies. 


The Refight

Not wanting to give the Spanish a chance to escape, the French started the battle with an attack on their right flank. One of the attacking French line infantry regiments opened fire on the Spanish defenders on the hill causing them slight casualties.

With no desire to face the advancing French columns, the Spanish left flank moved rearwards, but in doing so gave up the advantage of the high ground.

The French continued the assault on their right flank. They followed the retreating Spanish and engaged the Spanish infantry in the centre causing losses there.

Because of the French musket fire, the Spanish pulled back 2 regiments in the centre leaving their most advanced regiment to delay the French advance!

The French continued the attack on their right flank, three columns of line infantry reached the high ground and attacked the lone defending regiment of Spanish infantry.

The French attack eliminated the Spanish defenders.

Unable to do anything about the French advancing on his left wing, the Spanish commander ordered his centre to continue to withdraw. Even the light infantry which had been supporting the Spanish left, took the chance and withdrew.

Ignoring the Spanish retreating in the centre, the French commander yet again ordered an attack on his right flank. The three line infantry columns advanced over the plateau and attacked downhill. It was at this moment that the Spanish commander regretted giving up the advantage of the high ground.

The French attack was incredibly successful, both Spanish infantry regiments were eliminated and Brigadier Genaro Figueroa was forced to flee together with his staff.

The Spanish commander ordered the three infantry units on his right flank to withdraw. The would stand no chance against the French infantry opposing them. The light infantry withdrew across the bridge while the two columns of formed infantry started moving back, planning to eventually take up position on the hills to their rear.

Two French infantry columns charged down from the hills, capturing Brigadier Genaro Figueroa and killing most of his staff.

Worried by the French success on their left, the Spanish centre withdrew slowly.

Seeing the Spanish moving rearwards, the French commander ordered his left flank into the attack.

Seeing this, the Spanish continued their rearward movement with their infantry columns.

The French commander then ordered an assault with his centre. Four infantry units and a battery of foot artillery moved forward. One French column attacked the Spanish infantry, left behind when the rest of the Spanish centre withdrew.

The Spanish infantry took a few losses, but then turned tail and fled back to join the rest of the retreating Spanish centre.

The Spanish commander decided the time was ripe and ordered all the infantry in the centre to force march rearwards, with just 3 infantry units covering the withdrawl.

Even the French commander ordered a Forced March on his left flank, but the French infantry was too tired to be able to attack.

The Spanish artillery commander ordered his guns to quickly retire before the advancing horde of Frenchmen.

The French continued to attack on their left flank, with Major General Eugene-Casimir Villatte at their head. Three infantry columns advanced, wiping out one of the defending Spanish infantry regiments. The second Spanish infantry, the grenadiers, were not attacked because the French column had to move via wooded terrain and didn't have time to engage in melee.

General Blake ordered the last three infantry regiments that were covering his retreat in the centre to retire off the field of battle, thus getting a large proportion of his army away to safety and surviving to fight another day.

The only Spanish remaining on the battlefield was Brigadier Gabriel de Mendizábal, a battery of guns and a column of grenadiers. These would soon retire and join up with the rest of their army.

Although with possession of the battlefield, the French had managed something of a tactical victory, the battle was a definite French blunder and a strategic victory for Blake who escaped the French trap and conducted a crafty withdrawal.


The Outcome 

Spanish Victory:   Spanish 6 - French 5

For the next scenario, the Allies get 2 Glory Counters and the French get 1 Glory Counter.

Campaign Result 

  Victories     Banners  
  French       3     27
  Allies       2     23


Saturday, July 1, 2023

Vimeiro (21 August 1808)

This scenario is a refight of the Battle of Vimeiro (21 August 1808) during the Peninsular War. It was played using the Commands & Colors Napolionic rules but on hex terrain from Kallistra, buildings from Total Battle Miniatures, trees mostly from Timecast Miniatures and using 6mm figures from Baccus instead of blocks. This is the fourth battle using our Peninsular War campaign rules.


The History

Four days after Lieutenant General Sir Arthur Wellesley’s initial clash at Rolica, General Jean-Andoche Junot, with an army of 14,000, attacked the Anglo-Portuguese army of 17,000 troops. Junot wanted to defeat the invaders before reinforcements could arrive by sea. 

The battle of Vimeiro began with three brigades of French advancing to take Vimeiro hill and the town, while a fourth brigade had swung right to turn the British left flank. Unfortunately for Junot, his frontal attacks were uncoordinated, and failed to pin the British troops in the centre. Wellesley was able to redeploy his army to face the threat on his left. The French column attacks in the centre were finally forced back by sustained British volleys and soon afterwards the flank attack was also beaten back. Covered by his cavalry, Junot retreated towards Torres Vedras and the British did not pursue. 

Following the battle, the British senior commanders Generals Dalrymple and Burrard worked out a deal allowing Junot’s army to leave for France on British ships, taking all their guns and equipment. This deal, not surprisingly, caused a massive outcry in Britain.


The Refight

On the British left flank, the French forced marched their infantry, occupying the village of Vertosa before General Fergusson had time to react. 

Fergusson then ordered his infantry to push the French out of the village, but was repulsed with losses.

Now with artillery supporting fire, the British line infantry charged down from the hill into the village of Vertosa. They caused severe losses to the defending French infantry but could not take the village.

The French advanced with their entire right wing, to put pressure on the British left. The French light infantry opened fire on the British on the hill causing more casualties, but the British line stood firm.

The fight for the village continued, with both sides taking losses, but the French keeping the upperhand.

With General Jean-Baptiste Solignac at their head, the French right wing cavalry - one regiment of dragoons and one of chasseur à cheval - charged the British lines.

The dragoons rode over the British artillery, destroying it without serious losses to themselves. 

They then attacked the supporting infantry behind, causing them to form square and take casualties.

The chasseur à cheval then attacked a British infantry regiment. The British decided not to form square but to receive the charge in 4-deep line. Both sides too severe losses.

The Portuguese infantry in the woods, opened fire on the remaining chasseurs à cheval, destroying them.

The French Dragoons charged a different British line infantry regiment, forcing it to form square after taking casualties.

Musket fire from the Portuguese infantry caused the French dragoons to retire out of range.

General Jean-Baptiste Solignac ordered a new assault. The French light infantry in the village opened fire on the understrength British square destroying it and killing General Fergusson who was sheltering within.

The French dragoons then charged the second understrength British square wiping it out.

Emboldened by his success on the right flank, General Jean-Andoche Junot ordered his troops to push forward on both flanks and the centre. 

Seeing the French infantry cresting the hill, General Sir Arthur Wellesley pushed forward two infantry units to counter the French.

British artillery fire forced the French infantry on the hill to recoil.

British line infantry advanced towards the river, while their light infantry secured the woods.

Back on the British left flank, the French advanced their infantry through the wood.

General Sir Arthur Wellesley ordered his Portuguese troops forward in support of the British line infantry and even moved over the Rifles from the rear centre.

General Jean-Andoche Junot ordered La Grande Manoeuvre and moved forward a line infantry regiment, a light infantry regiment, a cavalry regiment and a battery of foot artillery ready to renew the attack.

The Portuguese infantry fired on the French line infantry causing 50% casualties.

Not wanted to be subject to any more fire, General Jean-Andoche Junot ordered a bayonet charge.

Even attacking up hill, the light infantry destroyed the defending British infantry and advanced to take the high ground.

The understrength French line infantry regiment also had to attack uphill, but it was forced to recoil with losses.

The third French infantry unit attacked the Portuguese and both sides took losses.


General Sir Arthur Wellesley decided to counterattack with a bayonet charge. The line infantry charged down the hill into the understrength French line wiping them out.  The Portuguese destroyed the second French line infantry.

The Rifles charged along the plateau into melee with the French light infantry. 

Both he Rifles and the French light infantry took losses.

The Rifles were now in trouble, when the French light infantry continued the melee they were destroyed.

General Sir Arthur Wellesley’s left flank had been wiped out, and he ordered his army to withdraw to avoid being cut off. Generals Dalrymple and Burrard will need to wait for another day, and land their reinforcements much further north at Porto.


The Outcome 

French Victory:   Anglo-Portuguese 5 - French 6

For the next scenario, the French gain 2 Glory Counters and the Allies gain 1 Glory Counter.

Campaign Result 

  Victories     Banners  
  French       3     22
  Allies       1     17


Sunday, February 12, 2023

Roliça - French Second Position (17 August 1808)

This scenario is a refight of the second stage of the Battle of Roliça (17 August 1808) during the Peninsular War. It was played using the Commands & Colors Napolionic rules but on hex terrain from Kallistra, trees mostly from Timecast Miniatures and using 6mm figures from Baccus instead of blocks. This is the third battle using our Peninsular War campaign rules.


The History

Général Henri François Delaborde expertly withdrew his force near Roliça to a second defensive position before the British flanking columns could encircle him. The new position was extremely strong and could only be reached frontally by four rugged gullies. General Sir Arthur Wellesley quickly repositioned his forces to repeat his double envelopment for his afternoon attack.

The view from the Anglo-Portuguese lines.

However, Wellesley's plan was pre-empted when the Lieutenant-Colonel Lake of the 29th Worcestershire Regiment prematurely forced his way up one of the central gullies. Wellesley chose to support Lake’s effort and the entire British army surged forward. The French battalions advanced to meet the British before they could emerge from the gullies, but were repulsed. Delaborde once again drew off his troops in good order. Ultimately Roliça was an indecisive action. Although Delaborde did slow the British advance, Wellesley forced him to retreat before he was reinforced.


The Refight

Looking at the French defensive line, the Allied commander decided that the French right was his opponent's weakest point.

So the British cavalry and RHA were ordered to move from the centre to the Allied left flank and then advance together with Ferguson's infantry.

While this was happening, the French waited patiently on their ridge line, opening up with an ineffective artillery fire.

The French artillery cause slight losses to one of Ferguson's infantry units as four unit fixed bayonets and charged towards the ridgeline. Ferguson hoped that he could cause the French infantry to retreat from the hill as it was only supported by artillery and no other unit.

The British infantry's bayonet charge up the hill caused only slight casualties to the defending French infantry who stood firm, but caused huge losses to the attackers.

The attack was stalled on the slope, and when the French counterattacked they mopped up the few remaining troops without loss to themselves.

The battle then moved to the centre, where the British infantry opened a ranged fire believing they would have the advantage. The caused minor casualties to the defending French light infantry but the return fire caused severe British losses and the British infantry took cover in the woods.

Seeing is heavy losses in the centre, the British general ordered forward an artillery unit and an infantry unit from his reserve. At the same time his infantry withdrew so as to be out of musket range of the French infantry.

Deciding that the time was ripe to strike before the British reinforcements to come into action, the French commander ordered his troops to advance down off the ridge.

The British had hoped to hold of the French with their superior musketry. While they did cause one French infantry unit to retreat, the British took heavy casualties, one unit being entirely wiped out.

The Allied commander was confident that the firepower of his British light infantry would destroy the advancing French infantry. But they failed to do so, and the French infantry column hit the light infantry and destroyed them.

In the hope of distracting the French advance, the British commander ordered a cavalry charge into the French right flank. The cavalry charged up the hill supported by close range fire from the RHA guns.

The French line infantry, decided not to form square because of the presence of the guns. The charging cavalry overran the infantry.

The British cavalry, impetuous as always, continued their charge into the French artillery. 

Even without the support of the RHA guns, the cavalry overran the French artillery. 

The French commanded order La Grande Manoeuvre, and brought forward 3 line infantry and one cavalry unit to halt the victorious British cavalry.

The British cavalry attacked down the slope with the support of the RHA guns, and attacked the French light infantry. This time the French infantry formed square.

Both the cavalry and the light infantry took losses, but the square held firm.

The French general shouted "Follow Me!" and the line infantry advanced to attack the British troops defending the woods.

Encouraged by the General's heroic leadership, the French stormed into the woods, wiping out the British infantry.

Having lost so many troops, Sir Arthur Wellesley called for a general withdrawal leaving the French victorious on the battlefield.


The Outcome 

French Victory:   Anglo-Portuguese 2 - French 5

For the next scenario, the French gain 3 Glory Counters and the Allies gain 1 Glory Counter.

Campaign Result 

  Victories     Banners  
  French       2     16
  Allies       1     12