Sunday, September 6, 2020

WWI Western Front Aerial Campaign - Episode 3

Contact Patrol

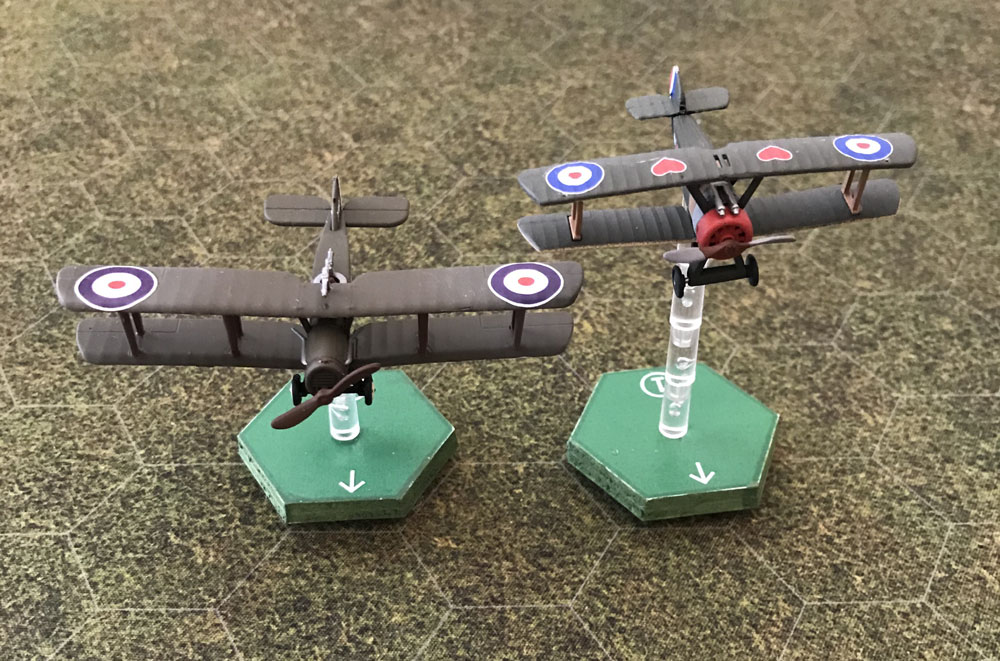
This is the third episode of a campaign representing fictitious battles in the air over the Western Front during the First World War. It was initially planned to use the Wings of Glory rules, but these were modified to use hex based movement in order to facilitate remote play over the Internet due to Corona restrictions.

Mission Briefing

Spring 1917 – Premier Escadrille International - Officers’ Mess

When the pilots are seated, Major Redmond, their Intelligence Officer, addresses them “Gentlemen. The German offensive at St Crupelle continues without slowing down. Day by day, step by step, the British and Canadian forces have been pushed back. Now only two small bridgeheads remain on the northern shore of the Juliana Canal. In the ruins of St Crupelle itself, the 2nd Battalion Dampshire Regiment are hanging on by the skin of their teeth. In recent days, the division headquarters has lost contact with the battalion as the front line is now very fluid. You will carry out a contact patrol, fly low over the fighting, identify the positions of friendly troops, and report back, thus enabling Army HQ to build up a picture of the front line and how the battle is going”.

Major Redmond and his map - by MW

After a hearty lunch, washed down with a nice bottle of claret, Charles “Half Pint” Carruthers walked to the hanger where his beige Airco DH.2 was kept and St John Featherstonehaugh went to the adjacent hanger and his olive green Airco DH.2. They taxied out, took off, climbed to 2,000 ft and flew towards St Crupelle. 

They knew that they would be fairly safe from small arms fire from both the enemy and their own infantry when above 1,500 ft. Soon after spotting the town and its canal, they saw two Hun scouts patrolling nearby.

Udo Lockbach and Gaspard Hauser were patrolling over their advancing infantry in the vicinity of St Crupelle. Hauser had an old Fokker Eindecker monoplane and Lockbach had an Albatros D.I biplane, a new modern design. They stayed above 2,000 ft to avoid friendly fire and in the hope of finding a lone enemy two-seater. 

The Hun in the Sun

We added a new rule for this game. If an aircraft is firing out of the sun then it gets the "aim bonus" and will do extra damage. This is because it isn't easy for the target to see the firer and thus has difficulty in manoeuvring so as to avoid the machine-gun fire.

The sun marker shows the direction of the sun, which is fixed throughout the game.

The Action

Udo and Gaspard parted in what could have been a pincer movement.

Half Pint and St John could see eight different infantry units on the ground in front of them. Some of them were the Dampshires and some were German. They dived their DH.2's so as to give themselves a good chance of recognising friend from foe on the ground.

Half Pint and St John continued to dive, but at 800 ft they were still too high to see the troops clearly.

Udo dived his Albatros while Gaspard stayed at 2,000 ft in his Eindecker.

Half Pint and St John continued to dive, and now at only a couple of hundred feet they could see the troops clearly.

Udo in his Albatros turned in towards the British. Gaspard finally realised he was too high and started to dive his Eindecker.

Gaspard realising he was still far too high, started to crash dive his Eindecker.

Gaspard Hauser in the dive - by MW

Both Half Pint and St John turned right and flew low over two infantry units. They could tell that these were infantry units, two companies of the 2nd Dampshire Regiment. Unfortunately for Half Pint and St John, the Dampshires hadn't had much experience at aircraft recognition, and both companies opened fire on the DH.2's despite the roundels on the underside of their wings.

Udo dived his Albatros down to the same height as the British, but in doing so missed an opportunity to open fire.

Gaspard turned in to chase the Brits. Udo got on Half Pint's tail and opened fire.

Udo turned slowly right.

Half Pint performed a half-loop and St John a very tight turn. Both now had Udo's Albatros in their sights. They opened fire wounding Udo and damaging his aircraft.

Gaspard came racing in towards the dogfight and took fire from the Dampshire infantry.

Udo in the Albatros went straight ahead out of the fight as Gaspard in the Eindecker came whizzing into the action and opened fire on Half Pint who's DH.2 was now more holes than canvas.

Udo turned sharply right and got behind Half Pint. 

St John and Gaspard nearly collided, but both managed to get off a quick burst before the dodged each other missing by inches.

Half Pint had decided his badly damaged aircraft wouldn't hold out much longer, so he put his foot down and was streaking towards his own lines with the information on the Dampshire Regiment's location. 

St John was still dogfight with the Huns and in what could have been a tricky situation. He had an Eindecker on his tail and an Albatros at close range to his left. Udo in the Albatros opened fire, but his machine-gun jammed immediately.

Although Gaspard in his Eindecker was on the tail of St John's DH.2, Gaspard couldn't fire because his machine-gun was jammed.

With his machine-gun jammed, Gaspard pulled out his trusty Mauser C96 pistol.
He emptied the 10-round magazine, but without any apparent effect - by MW

Half Pint was in the distance, heading towards home, but both the Huns gave chase. This gave St John a chance and he took it, he turned sharply and got behind Udo's Albatros, he opened fire but his machine-gun jammed. 

Half Pint could be seen in the distance, as the other three aircraft headed towards the British lines.

St John noticed that there were two Huns in font of him, so he turned his DH.2 away, as the Huns continued in vain to chase after Half Pint.

Seeing that the distance between the two Hun aircraft was opening, St John turned in to have another go at the nearest one: Udo's Albatros.

St John was lucky; Udo's engine started to flame!

St John turned towards the British lines, but neither Gaspard nor Udo could reach him before the needed to turn for home due to lack of fuel.

“Half Pint” and St John landed at a small strip near to Army HQ and reported the position of the companies of the 2nd Dampshire Regiment that they had located. When flying back to their own airfield, they flew over a huge cannon, the like of which neither had seen before.

Gaspard Hauser headed back to his aerodrome, to complain about his jamming machine-gun and to get more pistol ammunition for his Mauser. After landing he met Jörg Fritzl-Falconi, the Hungarian pilot, who, just the previous day, had suffered a horrible jam while dog-fighting with a Camel. "Scheisse!!" said Jörg, I am starting to think it really is "Sabotage!!".

The wounded Udo Lockbach decided that his fire damaged Albatros wouldn't make it back to the aerodrome, so he landed in a farmer's field right next to a small village. He climbed out, left the somewhat smoking aircraft, and walked into the village. There he found a small bistro with a rather attractive waitress. She tended his wound before serving him some local cuisine. Afterwards he hitched a lift back to the aerodrome. The next morning he woke up with a nasty case of food poisoning which would delay his return to flight duties. 

The Result

Entente Powers Victory

Campaign results:

  • Charles “Half Pint” Carruthers:  +2 XP, +1 luck 
  • St John Featherstonehaugh:  +5 XP, +1 luck
  • Udo Lockbach:  +1 XP, +1 luck
  • Gaspard Hauser:  +1 XP, +1 luck

Campaign Log

The Score:
1er Escadrille International 2     -     KuKuK Jagd-Schlachtstaffel 1

   Missions   Kills   XP   Luck   Notes 
Premier Escadrille International
Charles “Half Pint”
Carruthers (GB)
2 0 8 2  
“Dirty” Bertie Parker (AU) 1 0 6 1  
Captain Jack Yates (GB) 2 1 9 2  
Alphonse Lacourt (FR) 1 0 1 1  
St John
Featherstonehaugh (GB)
1 0 5 1  
Kaiserliche und Königliche und Kaiserliche Jagd-Schlachtstaffel
Udo Lockbach (DE) 2 0 2 1 Miss 2 episodes because of
wound and food poisoning.
Erbprinz Rupprecht
zu Sachsen-Zenda (DE)
2 0 3 2  
Florian Meier (DE) 1 0 3 1  
Jörg Fritzl-Falconi (HU) 1 0 3 1  
Gaspard Hauser (DE) 1 0 1 1  

Tuesday, August 25, 2020

WWI Western Front Aerial Campaign - Episode 2

Bombing

This is the second episode of a campaign representing fictitious battles in the air over the Western Front during the First World War. It was initially planned to use the Wings of Glory rules, but these were modified to use hex based movement in order to facilitate remote play over the Internet due to Corona restrictions.

Mission Briefing

Spring 1917 – A spy has reported the location of an elite British photographic unit to the German High command. It has been placed in a converted brasserie, Les Trois Magots, in the small French village of Saint-Benoît-du-Saucisse, a fair way behind the front lines. It is used to develop the photographic plates taken by photographic reconnaissance aircraft and also by analysts to interpret the photographs for the British General Staff. 

Because of the importance of the target, the High Command task the crack Kaiserliche und Königliche und Kaiserliche Jagd-Schlachtstaffel with the job of destroying the brasserie. Before dawn, Squadron Leader, Major Fritz Dettermann calls to his office his most experience two-seater pilot, Florian Meier and his Austro-Hungarian observer Jörg Fritzl-Falconi. He tells them to take off at dawn in the squadron’s Roland C.II and to bomb Les Trois Magots in order to put the British Photographic unit out of business. As it is know that the dastardly Premier Escadrille International will be operation in the area, he promises Meier that he will be escorted by two Albatros scouts.

At the crack of dawn, as the first beam of light appeared over the horizon, Meier and Falconi started up their Roland and beside them was Erbprinz Rupprecht zu Sachsen-Zenda in his Albatros D.V. Udo Lockbach should have been flying a second Albatros, but Lockbach was nowhere to be found. As the mission took off, one aircraft short, they were waved at by rider entering the aerodrome; what appeared to be a rather dishevelled German cavalry officer. They climbed quickly to 10,000 feet and then headed west towards Saint-Benoît-du-Saucisse.

As per their standard operation procedure, the Premier Escadrille International sent up a dawn patrol over the village of Saint-Benoît-du-Saucisse at 15,000 feet. The patrol was led by Captain Jack Yates in his Sopwith Camel, still merry after his kill the day before. Yates’s wingman was the French aviator, Alphonse Lacourt. Lacourt’s SPAD had been damaged on landing the day before, so he was loaned the squadron’s Sopwith Triplane. 

Yates spotted the Huns and followed by Lacourt had descended to 12,000 feet when the Huns saw the diving scouts. 

The Action

The Roland C.II continued to make a beeline for the target as the pilots closed the distance between their aircraft.

The aircraft continued towards each other with both the Camel and the Albatros accelerating in front of their companions.

The Camel and the Triplane turned in to intercept the Roland. The Roland expecting that manoeuvre turned away. The Albatros got onto the tail of the Triplane and Erbprinz Rupprecht zu Sachsen-Zenda opened fire.

Jörg Fritzl-Falconi, the Roland's observer, opened fire on Yates's Camel but his Parabellum MG14 machine gun jammed before a single bullet had left its barrel. "Scheisse!!" he shouted, and then he decided "Sabotage!!".

Despite being tailed, Alphonse Lacourt managed to turn his Triplane so tightly that the Albatros couldn't stay on his tail.

Jörg Fritzl-Falconi signalled to his pilot, Florian Meier, that he had a jammed gun and needed time to un-jam it. So Meier flew the Roland directly away from the enemy straight and level while Fritzl-Falconi desperately attempted to un-jam his Parabellum.

Yates had guessed where the Roland was heading, but it took him a little too long to turn his Camel.

The Albatros and Triplane were flying round in circles trying to get a shot at each other.

Yates in the Camel got a snap shot at the Roland and Meier got off a quick burst as the Camel rushed past his nose.

The Albatros and Triplane now met head-on, so Erbprinz Rupprecht zu Sachsen-Zenda and Alphonse Lacourt opened fire at each other at short range.

Meier turned the Roland back towards the target, but the cunning Yates was on his tail in the Camel.

Meier turned the Roland towards the village of Saint-Benoît-du-Saucisse, but Yates was going too fast in the Camel and overshot.

The Albatros and Triplane were, yet again, flying round in circles trying to get a shot at each other.

Meier flew as straight and steady as he could towards he village of Saint-Benoît-du-Saucisse and when they were over Les Trois Magots, Fritzl-Falconi dropped the bombs right on target. Immediately after Fritzl-Falconi had shouted "Bomben weg!!", Meier put the Roland into a tight right turn; at least as tight as the lethargic Roland could manage.

Luckily for the Roland, Meier's tight turn caused Yates in the Camel to overshot yet again.

Now unencumbered by bombs, the Roland turned tighter and dived at the same time. Yates turned again onto the Roland's tail but was too high to get off a good shot.

Erbprinz Rupprecht zu Sachsen-Zenda accelerated in the Albatros and came speeding to the assistance of the Roland leaving Alphonse Lacourt in the slower Triplane behind.

The Albatros fired at the Camel.

Having completed the mission, Florian Meier put his Roland into a steep dive back towards the German front line. Jörg Fritzl-Falconi scanned behind them looking for a target, but they had too good a start for the somewhat shot-up enemy to catch them, especially with the Erbprinz Rupprecht zu Sachsen-Zenda protecting their tail in his Albatros.

Jörg Fritzl-Falconi was so happy with his successful bombing mission that he had his portrait painted by the famous artist Toulouse Vinplage. He wrote a letter explaining how he had bombed and destroyed a secret photographic unit that the dastardly Engländer had hidden in a brasserie. He sent both back home to his mother, the Countess Fritzl-Falconi, who lived in the Schloss Schönbrunn.

Leutnant Jörg Fritzl-Falconi - by MW

At the Premier Escadrille International's aerodrome one riddle was solved. Who was the shadow that Lieutenant Lugeau has seen sneaking around after dark? All of the pilots were drunk in the mess, so it couldn't have been one of them. Finally the riddle was solved; it was Malcolm the squadron mascot. Malcolm, the goat, was put into his pen every night by his handler, an Erk named Boyd. But what Corporal Boyd didn't know, was that Malcolm could open the gate whenever he wanted, and wandered round the aerodrome looking for something to chew on.

The Result

Central Powers Victory

Campaign results:

  • Florian Meier:  +2 XP, +1 luck 
  • Jörg Fritzl-Falconi:  +2 XP, +1 luck
  • Erbprinz Rupprecht zu Sachsen-Zenda:  +2 XP, +1 luck
  • Captain Jack Yates:  +1 XP, +1 luck
  • Alphonse Lacourt:  +1 XP, +1 luck

Campaign Log

The Score:
1er Escadrille International 1     -     KuKuK Jagd-Schlachtstaffel 1

   Missions   Kills   Experience   Luck   Notes 
Premier Escadrille International
Charles “Half Pint” Carruthers 1 0 6 1  
“Dirty” Bertie Parker 1 0 6 1  
Captain Jack Yates 2 1 9 2  
Alphonse Lacourt 1 0 1 1  
Kaiserliche und Königliche und Kaiserliche Jagd-Schlachtstaffel
Udo Lockbach 1 0 1 0  
Erbprinz Rupprecht zu Sachsen-Zenda 2 0 3 2  
Florian Meier 1 0 3 1  
Jörg Fritzl-Falconi 1 0 3 1  

Saturday, August 15, 2020

WWI Western Front Aerial Campaign - Episode 1

Photo-Reconnaissance

This is the first episode of a campaign representing fictitious battles in the air over the Western Front during the First World War. It was initially planned to use the Wings of Glory rules, but these were modified to use hex based movement in order to facilitate remote play over the Internet due to Corona restrictions.

Campaign Background

The formation of the squadrons

Early Spring, 1916. Both sides' armies try new measures to preserve the fighting spirit in the war-weary homelands. The latest idea is to strengthen solidarity within the alliances by putting together international air squadrons, whose adventures the newspapers eagerly report on. A whimsical coincidence has placed the "Premier Escadrille International" and the "Kaiserliche und Königliche und Kaiserliche Jagd-Schlachtstaffel" directly opposite each other. Neither of these multinational squadrons has a clue about the complicated and intricate stories they are about to experience.

Premier Escadrille International

After long and heated discussions, France has agreed that the squadron is to be led by an Englishman, the hard-nosed Major Brackton. This is a victory for England, but a victory that could only be won by accepting the appointment of a French inspector to investigate how efficiently the squadron works. This system does not bode well for the future – Inspector St Prix has, even before the squadron carried out its first mission, directed devastating criticism at Major Brackton's way of leading the squadron. Criticism that could ruin Brackton's further career. Aggravating the situation, there are rumors that several of the American and Canadian the pilots may have been recruited by a German spy, “Fräulein X”, operating on the passenger ships that brought them across the Atlantic. Even among Europeans, there are individuals worth watching. Sous-Lieutenant Foudrelle writes extensively in his notebook - poetry, he claims - but why may nobody see it? And who is the shadow that Lieutenant Lugeau has seen sneaking around after dark?

Kaiserliche und Königliche und Kaiserliche Jagd-Schlachtstaffel

If the situation is worrying and chaotic on the Entente Powers’ side, then it is even more worrying and confused on the Central Powers’ side. Squadron Commander Fritz Detterman thought he had encountered most things during his years in the colonial police in German South West Africa, but already after a few days at the new the squadron, he faces a series of strange questions. General Schmidt stopped by to say hello and good luck to him. An hour after he’d left, he telegraphed that he had forgotten his bag containing the plans for the Christmas offensive at the squadron - but here no one knew anything about any bag. Was there then reason to believe the rumours that allied spies had succeeded in infiltrating the newly formed squadron? Maybe one of the pilots from Austria-Hungary's unruly small nations, the ones with strange names? And speaking of strange pilots - who actually is the young pilot with memory loss appeared that this morning at the squadron? All he had with him was a pilot's license issued to "Gaspard Hauser", an identification badge of the same name and a backpack with a bible and a pickled sausage. And finally, who are the two identical men who both claim to be the heirs of Sachsen-Zenda?

Mission Briefing

Spring 1917 – The Premier Escadrille International has been tasked with photographing the bridge over the Mosel at Rettel across which a large number of Hun supplies and reserves are passing. To do this they have been allocated a new Bristol F.2B Brisfit two-seater. It has modified to carry a camera with a newly developed lens capable of taking detailed photographs from 15,000 feet. They will be escorted by one of the squadron’s Sopwith Camel scouts. Charles “Half Pint” Carruthers will fly the Brisfit with “Dirty” Bertie Parker as his observer and cameraman. Captain Jack Yates will be escorting them in his Camel. It takes 20 minutes to climb to altitude before heading towards their target. 

They keep a good lookout because it is known that the Kaiserliche und Königliche und Kaiserliche Jagd-Schlachtstaffel is flying patrols in the area with their Albatros scouts.

The Germans had taken off from their aerodrome and were now patrolling over the Meuse bridge at just over 15,000 feet. The patrol was led by Udo Lockbach in his blood red Albatros D.III with the Erbprinz Rupprecht zu Sachsen-Zenda as his wingman flying an Albatros D.V.

The Action

Captain Jack Yates in the Camel (1) spotted the bridge and at the same time noticed the two Huns patrolling nearby. He waggled his wings to alert Half Pint in the Brisfit (2).

Udo Lockbach in the red D.III (3) flew straight ahead while Sachsen-Zenda in the speckled D.V (4) slipped left. Yates and Half Pint headed straight towards the bridge. 

Half Pint decided there and then on his tactics, he would head straight for the bridge to get there as soon as possible while maintaining height and then once Parker had photographed the bridge he would turn for home diving in order to gain speed and hopefully outrun the Hun.

True to his plan, Half Pint in the Brisfit headed straight towards the bridge. His observer, “Dirty” Bertie Parker, had been gesticulating at Yates in the Camel. Yates totally misunderstood this, and turned tightly to the left.

Sachsen-Zenda in the speckled D.V attempted to dive down on the Brisfit and at the same time turn towards it; this unfortunately for him, caused the Albatros to enter a spin.

Udo Lockbach in the red D.III, having predicted that the Brisfit would continue straight for the target, turned in toward it and opened fire.

Somewhat luckily, Sachsen-Zenda recovered from his spin and turned back toward the fight, climbing slowly to regain height.

Evan Yates, realising his mistake, headed back toward the fight.

Half Pint disliked being shot at and decided that his original plan wouldn't work. Instead he slipped the Brisfit in towards the red Albatros hoping that the Hun would overshoot and that Parker in the rear seat would get a good shot.

But Udo Lockbach in the D.III was sneaky, and he turned tightly and ended up on the Brisfit's tail at close range!

Udo Lockbach opened fire doing good damage from the tailing position. Luckily for Half Pint and Parker Udo hadn't managed to position his Albatros in the blind spot created by the tail assemblage, so Parker returned fire with his Lewis Gun. His first couple of bullets hit a fuel line and flames could be seen coming from the Albatros. But before Parker could finish off the Albatros, his gun jammed!

Both Albatros scouts headed toward the bridge where they expected the Brisfit to be. But Half Pint had decided that the bridge was a little to hot for comfort and he turned left giving Parker a chance to unjam his Lewis and hopefully time for Yates to return to the fight.

Both Albatros scouts, realising that they had missed the Brisfit, turned back towards it. 

Half Pint turned sharply right towards the bridge and got in a quick shot at Sachsen-Zenda in the D.V while Parker in the rear seat was unjamming the Lewis and attempting not to be thrown out of the violently manoeuvring aircraft. Half Pint's shot was a lucky one, and smoke started pouring out of the D.V. 

Yates had now got the Camel up to full speed, and was heading back into the battle. He opened fire on the red D.III and damaged the tail fin. It would take a while before the D.III could turn left.

Yates in the Camel was now back in the fight, he opened fire on the smoking D.V. 

Udo Lockbach turned sharp right, trying to get his tail fin working again.

Half Pint flew a straight run in toward the bridge to give Parker in the rear seat a good shot with the camera. Parker did his duty and took the photograph, despite being severely tempted to pick up his Lewis and shoot at the circling red Albatros.

Sachsen-Zenda, in the damaged and smoking D.V, headed for home.

The Camel and the red Albatros were circling round each other, trying but failing to get any good shot.

Half Pint in the Brisfit had also decided that it would be wise to head for home, both Albatros scouts had made nasty holes in his new Brisfit. Parker in the back seat, fired a Parthian shot at the D.III. This shot hit Udo's engine causing it to loose power.

Realising that the D.V had left the pitch, Half Pint decided to have another go at the lone red Albatros before play ended so he turned back.

With both engine damage and fire damage, Udo in the red Albatros decided that discretion was the better part of valour and turned to follow Sachsen-Zenda's D.V home to their aerodrome.

Yates had turned his Camel tightly to the right, and whether by skill or fluke, had ended up on Udo's tail.

Yates's shot was at long range, but yet again Udo's engine was hit. The engine seized up immediately.

Udo put his D.III into a dive and glided down. He performed a dead-stick landing in a farmer's field near to the bridge. He was feasted in the officers’ mess of a Prussian infantry regiment who wrongly believed that Udo had stopped die Engländer from bombing the bridge while they had been marching across it. He was returned, on horseback, to his aerodrome early next morning with a huge headache.

When the photographic plate was developed, Charles “Half Pint” Carruthers and “Dirty” Bertie Parker were treated to a slap up meal in the officers' mess by their Squadron Leader, Major Brackton.

Charles “Half Pint” Carruthers and “Dirty” Bertie Parker
outside the officers' mess - by MW


The Result

Entente Powers Victory

The score so far:
1er Escadrille International 1     -     KuKuK Jagd-Schlachtstaffel 0

Campaign results:
  • Charles “Half Pint” Carruthers:   +6 XP, +1 luck
  • “Dirty” Bertie Parker:   +6 XP, +1 luck
  • Captain Jack Yates:   1 kill, +8 XP, +1 luck
  • Udo Lockbach:   +1 XP 
  • Erbprinz Rupprecht zu Sachsen-Zenda:   +1 XP, +1 luck

Friday, July 3, 2020

Age of Sail - The Admiral's Nephew

I have been working on a modified set of hex based naval rules (called KAOS) for fighting medium sized Age of Sail battles on hexes based on the old Avalon Hill Wooden Ships & Iron Men rules and using ships from the Sails of Glory range. I have also a set of campaign rules (KAOS CAMP) which can be used to follow the adventures of the captains through the scenarios.

Because of the Corona situation, the battle was fought via a Skype link. I plan to use a playing area with 40 mm hexes but for this test, under Corona-isolation, I used the grass green 35 mm hex playing are that I had readily available and hastily made ship bases.

British Briefing
Captain Kestrel of the 18-gun sloop STORK was called into the Admiral's cabin aboard the flagship, HMS PRINCE, anchored in The Sound. Kestrel was there introduced to the Admiral's nephew, a young and up-and-coming Lieutenant commanding the 10-gun cutter WEASEL. Kestrel was to take his ship along with the WEASEL and another 18-gun sloop HAZARD to patrol the channel looking for French prizes and to give the Admiral's nephew his first enemy action in command of his own vessel. The three ships headed out into The Channel from Plymouth with the morning tide. Late  in the day, as the sun was beginning to set, they spotted two French ships.

The officers of HMS STORK - by MW
Captain Kestrel and his trusty First Lieutenant 

French Briefing
You have been ordered to sortie out from the naval base at Brest and attack any British shipping in the channel, hopefully picking up some nice prizes coming in from the Atlantic. As well as your own 28-gun frigate La Bayonnaise, you will be accompanied by her sister ship Brune. You were patrolling up and down, across the channel, when as the sun was beginning to set you spy three vessels, smaller than yourself, heading down the channel towards the ocean.

Start)
The British sloops HMS STORK(6) and HMS HAZARD (7) accompanied by the cutter HMS WEASEL were broad reaching under easy sails with the wind from starboard. The French 28-gun frigates La Bayonnaise (11) and Brune (12) were running under easy sails.

The two forces started 12 hexes apart, well out of cannon range. The wind marker shows the wind blowing from the bottom of the picture.


1)
The French frigates continued downwind. The British sloops continued forward, but the Admiral's blue-eyed boy in WEASEL turned downwind and crossed the bow of STORK forcing her Captain to let her sheets fly to loose way.


2)
Even the British sloops now turned downwind so that both forces were now sailing in parallel.


3)
The French frigates continued downwind. The British reduced sail and let the French move ahead.


4)
The French frigates and British sloops continued downwind. WEASEL reduced sail to let the sloops move ahead.


5)
The French frigates continued downwind and then La Bayonnaise turned in toward the British. The British sloops continued downwind and yet again WEASEL reduced sail to let the sloops move ahead.


6)
La Bayonnaise continued to close her enemies with Brune following in her wake. STORK turned in to meet the French. HAZARD continued downwind and WEASEL reduced sail to let her pass.


7)
La Bayonnaise opened fire and raked STORK. Brune closed with STORK. HAZARD continued downwind and WEASEL reduced sail to let her pass.


8)
La Bayonnaise and Brune fired their broadsides into STORK and she returned fire. WEASEL reduced sail to let HAZARD pass across her bow.


9)
La Bayonnaise and STORK exchanged fire as did Brune and HAZARD. WEASEL followed along behind HAZARD.


10)
La Bayonnaise fired into STORK causing her to strike her colours. Brune and WEASEL exchanged broadsides. HAZARD fired into La Bayonnaise causing severe damage to her hull.


As night fell, the damaged La Bayonnaise decided that discretion was the better part of valour and turned towards Brest with HAZARD following for most of the night before loosing her in the dark. Brune's final broadside did grave damage to WEASEL's hull and then Brune turned to follow her sister ship towards Brest.

STORK signalled WEASEL to remain in company. Luckily for Captain Kestrel of the STORK, his carpenter was among the best in the fleet. Together with the crews of STORK and WEASEL he worked tirelessly throughout the night so that when dawn came both the hulls were repaired.

STORK and WEASEL were soon joined by HAZARD and they returned to Plymouth where they anchored in The Sound.

The flagship HMS PRINCE soon signalled for Captain Kestrel to repair onboard accompanied by the Admiral's nephew. Luckily for these two, the carpenter's work was so good that both their vessels appeared to be in good order, at least when seen from the flagship.

The admiral was so pleased to see his nephew returned that he handed out bumpers of port. On hearing his nephew's report, he decided that he must be reward for his gallant fight against the French frigates of much superior force. He resolved there and then to take the STORK away from Captain Kestrel and give her to his nephew. His nephew was worth such a vessel, blood always tells, and after all the admiral had never once heard Captain Kestrel say "balcony".

Luckily for the admiral, there was a frigate in Plymouth Dock, the captain of which had gone up to London to take his seat in Parliament. So together with words of weak praise - but no more port - this was offered to Captain Kestrel.