Wednesday, April 21, 2021

WWI Dogfight over the Western Front

This is my very first try with new rules that attempt to use Wings of Glory on a hex mat. They use hexes in order to simplify play over the Internet while staying isolated at home. Each aircraft has a number of different manoeuvres it can perform, but instead of being represented by arrows they are represented by hexes traversed.

Two Sopwith Camels met two Albatros D.Va's above the fields of Flanders.

Turn 1:
The Camels tried some sneaky manoeuvring while the Huns headed straight in.

Turn 2:
The Camels turned back straight.

Turn 3:
The continued to close each other.

Turn 4:
The combatants met head on.

The RFC seemed to be slightly better shots.

Turn 5:
The Huns tried to gang-up on one RFC Camel at a time

One Albatros D.Va got on the tail of Red Nose doing serious damage with a short range burst.

Turn 6:
Both Camels performed Immelmann turns.

Yet again the Huns tried to concentrate on Red Nose but the black-bodied Albatros obstructed the shot of his yellow-bodied comrade.

Turn 7:
Both Huns continued to follow Red Nose.

The yellow-bodied Hun fired a point blank burst into Red Nose. However, the black-bodied Hun chose to fire at Grey Nose which had flown straight in front of him even though the range was longer. 

Red Nose could take no more damage, and plummeted earthwards.

Turn 8:
Grey Nose and the black-bodied Albatros collided [entered the same hex].

The collision did more damage to the Camel than to the sturdy Albatros.

The black-bodied Albatros still managed to get off a burst of fire into the Camel.

Turn 9:
Using the advantage of its rotary engine, the Camel turned tightly to the right, getting on the tail of the yellow-bodied Albatros.

The Camels burst of fire caused major damage to the Albatros, hitting its rudder and causing smoke to start pouring out of the engine.

Turn 10:
Both the black-bodied Albatros and the Camel flew slowly straight ahead, while yellow-body performed an Immelmann turn.

The bursts of machine-gun fire from the Camel did more damage to the Albatros than vice versa.

Turn 11:
Now it was the turn of the Camel and the black-bodied Albatros to Immelmann.

Which gave the Camel a close range tailing shot at the yellow-bodied Hun. The black-bodied Albatros couldn't get a clear shot at the Camel.

The yellow-bodied Albatros went down in flames!

Turn 12:
While celebrating his kill, the Camel pilot made the mistake of letting the Albatros get on his tail.

The Hun saw his machine-gun bullets tearing holes in the tail and fuselage of the Camel. Then all of a sudden he heard a loud "clunk" noise and then silence. The Hun's twin Spandau IMG 08 machine-guns had jammed.

Neither the Camel pilot nor the Albatros pilot wanted to continue the fight. The severely damaged Camel was now flying on a wing and a prayer and didn't want to risk the Albatros pilot getting his spandau's unjammed. The Albatros pilot, on the other hand, didn't want to risk a contest without working guns.

Both pilots turned and headed for home.


Tuesday, April 20, 2021

The Battle of Beneventum (275 BC)

In these times of isolation because of corona, I have been playing sequentially through all the scenarios the from Commands & Colors Ancients Expansion #1 - Greeks and Eastern Kingdoms against a friend over Skype.

Next on our list was scenario 118, the Battle of Beneventum...

Pyrrhus returned from Sicily to Italy in 275 BC with a weak army which he quickly recruited up to a strangth of 20,000 infantry, 3,000 cavalry and 20 elephants in order to attack Rome once again. He was met by Consul Manius Curius Dentatus with an army of 20,000 infantry and 2,000 cavalry. The Romans set up camp near Beneventum to await Pyrrhus.

In time for the fight, I received a small package through the mail. I opened it up to find that my friend had made me a game board, but no ordinary one. When I opened it up, it folded out like in many children's books, and the camp fortifications and woodland popped up. 

We both set up the battle and started the Skype call. Battle commenced.

I was lucky in my command cards, and was able to get my troops all out of the fortifications and advancing on the enemy. Despite loosing the cavalry on my right flank fairly early it was a close fought battle. I was leading 6 banners to 5, all I needed was one more banner to win the game.

I had lost my heavy infantry and my weakened medium infantry wasn't looking forward to facing the phalanx. Luckily the phalanx hadn't moved from its baseline. So I sent forward the light infantry on my right flank to pester the Epirote elephants.

My light troops, so annoyed the elephants that they went on the rampage. Their light infantry were not affected but they rampaged towards the board edge trampling their own light cavalry which lost its one remaining block. 

The loss of the light cavalry gave me my seventh and final victory banner. It was a wonderful feeling, to gain the victory when the enemy's elephants rampaged through their own friends causing carnage.


Saturday, March 20, 2021

Fighters over Kent - July 1940

This wargame was played using Wings Of Glory. The Luftwaffe fighters were controlled using my "autopilot rules" based on the Wings Of Glory Solo rules by Herkybird.

During the Battle of Britain, the Luftwaffe performed fighter sweeps over the South of England with the intention of bringing the RAF fighters to combat and destroying them.

As dawn broke at RAF Little Bobbington the pilots saw two brand new Supermarine Spitfires coming in to land. Pilot Officers William ”Half Pint” Carruthers and Emmett Hollingberry rushed from the dispersal hut to examine the new planes. They were especially interested in the wings, out of which poked large cannon. These were the new B wings which had been modified to carry one 20 mm Hispano cannon per wing, which replaced the two inner .303 machine guns on the normal model.


SPECIAL RULE FOR FIRING SPITFIRE MK IIB:

Normal Damage Tokens: BCC / AC
One Cannon Jammed: BC / C
Both Cannons Jammed: B / A

Cannon Jam:

  • If firing causes two C damage and both are zero then one cannon has jammed.
  • If firing causes one C damage and it is a zero, draw a second C damage. If both are zero then one cannon has jammed. Discard the second C damage.
  • It is not possible to unjam the cannon while airborne.


Pilot Officers William ”Half Pint” Carruthers and Emmett Hollingberry were scrambled to meet some incoming Bandits. However they failed to make contact. Somewhere near Ramsgate, on their way back to Little Bobbington aerodrome, they spotted two Messerschmitt Bf 109 E's over the Channel heading towards England. They turned to intercept.

The Germans spotted the oncoming Spitfires and headed straight towards them.

"Pincer!!" shouted Half Pint over the radio. He slipped his Spitfire right and Hollinberry turned left, as the Me 109s continued straight ahead into Half Pint's trap.

Half Pint continued to slip his Spitfire to the right and Hollinberry flew left, as the Me 109s continued straight ahead into Half Pint's trap.

Half Pint turned in towards the Me 109s, but perhaps timed this a little too early. Hollingberry continued straight ahead, timing his turn too late. Yet again, the Me 109s continued straight into the trap.

Half Pint exchanged fire with the nearest Me 109 at long range. The cannon fire from both planes missed their opponents, but Half Pint's four .303 calibre Browning machine guns punched holes in the Messerschmitt's fuselage.

[Note: We much preferred the WWI damage cards to the WWII damage tokens, so we printed some damage cards to use for WWII with the same values as the tokens.]

Half Pint flew straight ahead towards the Me 109 which slipped in towards him. Hollingberry turned slowly right as the second Me 109 turned sharply towards him.

As Half Pint flashed passed the Me 109 with only inches to spare, both planes opened fire. The second Me 109 fired a burst hitting Hollingberry at extreme range.

[Note that when using the autopilot rules, the German planes ignore any special damage]

Hollingberry finally turned in to face an Me 109 as Half Pint got in behind him.

Both Spitfires opened fire on the Me 109 causing some nasty holes to appear. Hollingberry's Spitfire shuddered as an exploding cannon shell jammed the rudder controls.

The three planes in the dogfight all flew straight, while the second Me 109 turned in to have a go at One Pint who had been concentrating on the wrong enemy.

A long range burst of cannon fire damaged the rudder controls of One Pint's Spitfire.

Half Pint performed a half-loop, hoping to catch by surprise the Me 109 that had been firing at him. Even the other Me 109 performed a half-loop, but was too far away to get on Hollingberry's tail.

Half Pint was caught in a close range cross-fire from both enemy planes, although he managed to get in a nasty close range burst at one of them.

[Note: We have a house rules that allows overlapping aircraft to fire at each other.]

Half Pint accuracy was so good, that he wounded his opponent, who's Me 109 plummeted seawards. Because of his wound, the pilot didn't have the strength to either bail out or ditch properly. His plane exploded when it crashed into the see.

Half Pint's Spitfire started smoking and dived out of the dogfight. Luckily he had the strength to pull up the nose just in time and ditch off the coast of Ramsgate. 

Now Hollingberry performed a half-loop and turned to face the Me 109 behind him.

They opened fire at long range. Hollingberry saw, rather worryingly, that his starboard cannon wasn't firing; it had jammed. 

The two planes wizzed passed each other with only inches to spare.

Hollingberry opened fire, but now even his remaining cannon jammed. Only bullets from his machine guns were hitting the Me109. 

The Me 109 returned fire with devastating effect, its cannon fire blew huge holes in the Spitfire's fuselage and caused an petrol leak which caught fire.

Hollingberry could do nothing to save his stricken plane. He pushed back the canopy, rolled the plane over and bailed out.

The German pilot in the lone remaining aircraft turned his Me 109 for home. Upon landing he saw that it was full of holes and looked like more like a sieve than a Messerschmitt. He celebrated his victories (he claimed both Spitfires) and his lucky escape by downing large quantities of looted Champagne and Cognac.

William ”Half Pint” Carruthers ditched his stricken Spit in the Channel. Margate's lifeboat, the Lord Southborough, was sent out to rescue him. The crew pulled him aboard, bandaged his wounds and made him feel comfortable with a generous helping of brandy which he later declared had ‘wonderful results’.

Emmett Hollingberry bailed out from his flaming plane. He pulled the ripcord and his parachute opened. Hanging below this silken canopy he floated downwards. As he descended the wind blew him over the shoreline, across that barbed wire and booby-traps on the beach and dumped him on the shorefront promenade. Rather dazed by the heavy landing and a bashed head, he looked up and saw through misty eyes, four beautiful nubile young ladies rushing towards him. It took Hollingberry only a few seconds to blink his eyes and shake his head to clear it. But in that time, the young ladies had disappeared. At first he thought it was just a dream, until he realised that his silken parachute had disappeared with them.


Saturday, March 13, 2021

Kanalkampf - July 1940

This wargame was played using Wings Of Glory. The Luftwaffe planes were controlled using my "autopilot rules" based on the Wings Of Glory Solo rules by Herkybird.

July 1940: The Admiralty persisted in continuing with a traditional coastal trade, forming merchant ships into convoys protected both by convoy escorts (usually destroyers) and air cover from Fighter Command. The Germans could not resist attacking such juicy targets. This part of the Battle of Britain was known as kanalkampf (Channel Fight). There was actually no real need for the British to run convoys through the Channel and the straights of Dover, the cargo could have been sent on the railroads.

From the RAF’s point of view, the campaign was not what Fighter Command had prepared for; pilots involved in dogfights risked drowning when they took to their parachutes, because the RAF had no air sea rescue service to put into operation, whereas the Germans had He59 floatplanes for this purpose.

The German attack against coastal shipping had started at the beginning of July. However, the official date of the beginning of the Battle of Britain was fixed on July 10th.

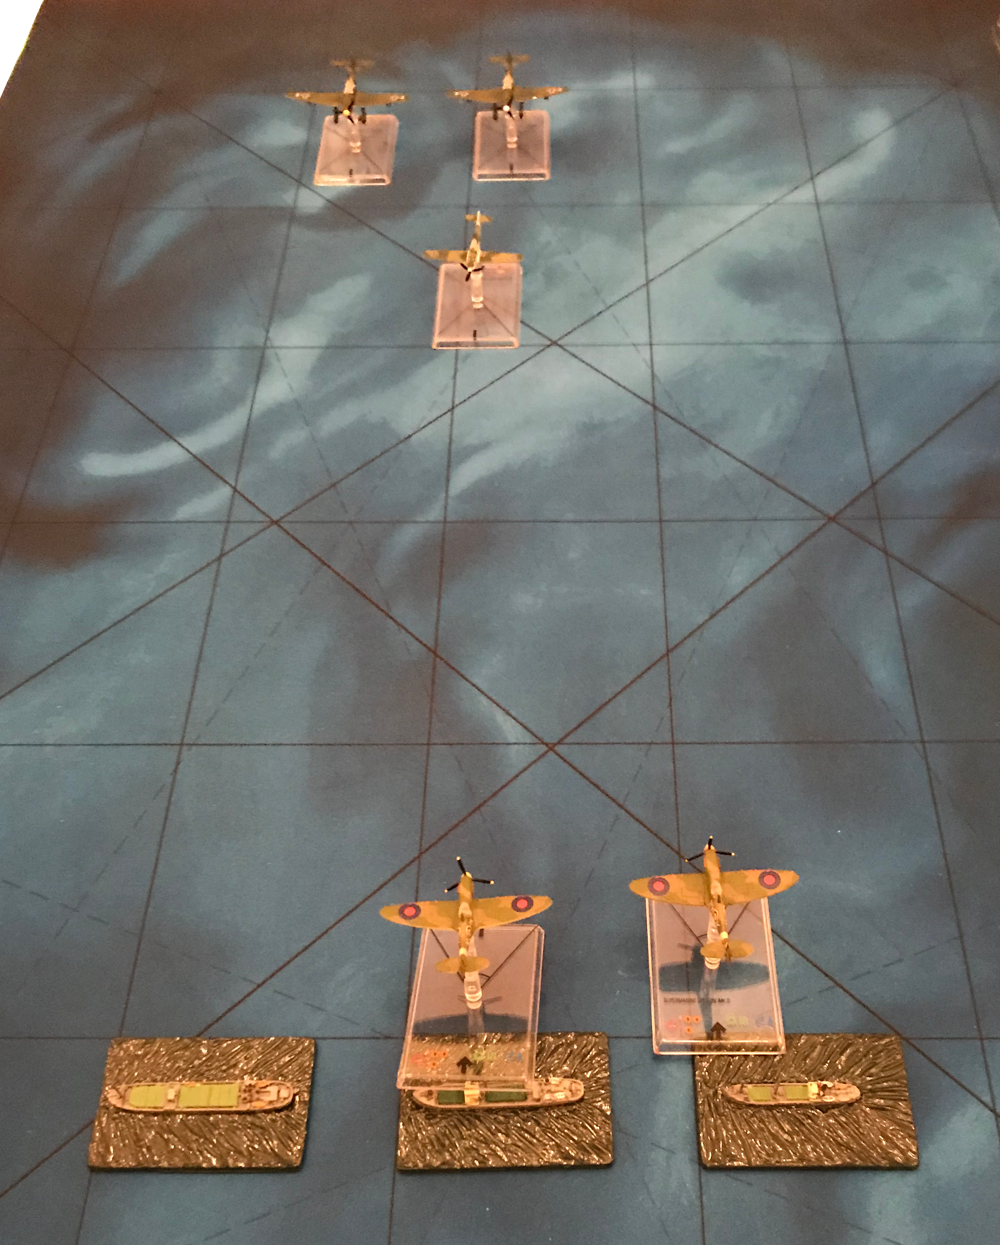
Two Junkers Ju 87B Stuka dive-bombers escorted by a Messerschmitt Bf 109E fighter headed out to attack a convoy.

Our two intrepid RAF pilots, Pilot Officers John ”One Burst” Johnson DFC and Emmett Hollingberry, took off from Little Bobbington aerodrome in their Supermarine Spitfire Mk I's and headed out over the Channel to protect the eastwards bound convoy travelling towards Dover.

The Spitfires flew over the convoy with Hollingberry on One Burst's starboard wingtip. They spotted the Germans in the distance, heading directly towards the merchant ships.

Both Spitfires slipped right. The Me 109 slipped left to meet the Spitfires and the two Stukas continued slowly straight ahead towards the convoy.

The two Spitfires slipped right again. The Me 109 flew straight ahead to meet the Spitfires. The two Stukas continued slowly straight ahead towards the convoy.

One Burst exchanged fire with the Me 109. The Spitfire's eight .303 inch machine-guns ripped large holes in the Me 109's fuselage and the 20mm cannon on the Me 109 did much the same to the Spitfire.

One Burst and the Me 109 both flew straight ahead, missing each other by inches. One Burst, with Hollingberry still on his starboard wing, now came face to face with one of the Stukas.

One Burst opened fire at close range, damaging the Stuka. The Stuka returned fire with its two  7.92 mm MG 17 machine gun, but these did no noticeable damage to One Burst's Spitfire.

[Note that when using the autopilot rules, the German planes ignore the smoke special damage]

One Burst continued straight ahead passed the Stukas. Hollingberry turned in, but too late or too gently in order to have been able to target the Stukas, both of which continued towards their targets. The Me 109 performed a half-loop in an attempt to get on One Burst's tail, but was too far away to be able to target him.

As One Burst's Spitfire flashed past the Stuka, the Stuka's rear-gunner firer off a few shots but without doing any noticeable damage to the Spitfire.

The Me 109 continued straight ahead and Hollingberry turned in tightly to meet it. One Burst turn sharply left, trying to shake the Me 109 off his tail.

Hollingberry exchange fire with the Me 109.

Hollingberry shot past the Me 109. One Burst turned in towards the Stukas, both of which were starting their bomb-run on the merchant ships.

The rear-gunners of both Stukas fired off telling bursts at long range with their single MG 15 machine guns. Hollingberry opened up on the nearest Stuka but, being put off by the hail of incoming 7.92 mm bullets, he missed completely.

Hollingberry chased the Stukas. The Me 109 performed a half-loop to get on Hollingberry's tail. One Burst headed towards the nearest Stuka.

The Me 109 opened up on Hollingberry, but his cannon shells missed completely. Hollingberry had now got a Stuka centred in his sights and opened fire again. Both Stuka rear-gunners got off a quick burst at Hollingberry before the pilots put the Stukas into a dive and bombed the ships.

The first Stuka hit its target with its 250 kg bomb while its four 50 kg bombs bracketed the ship. The second Stuka only managed to hit its target with one 50 kg bomb.

Having released their bombs, the Stukas turned for home. Hollingberry chased down the Stukas and now closed in to short range. The Me 109 was on Hollingberry's tail and trying to distract him. One Burst continued following the Stukas, but was only slowly closing the gap.

At close range, Hollingberry's eight machine guns shot up the Stuka badly. The rear-gunner of the Stuka did the best he could with a single machine gun. The cannon of the Me 109 hid the Spitfire's rudder.

The Stukas continued to turn back towards the French coast. Hollingberry's Spitfire could turn much tighter, and he turned inside the lead Stuka. 

One Burst turned his Spitfire in to help Hollingherry, but timed it badly and crossed the Me 109's nose.

One Burst opened fire on the rear Stuka, but missed his shot. The Me 109 opened fire on One Burst at just long range, doing some nasty damage.

Hollingberry fired at close range into the lead Stuka, his machine gun bullet ripped holes in the German. The German rear-gunner fired back, but his single machine gun did much less damage. 

[Note that when using the autopilot rules, the German planes ignore the rudder jammed special damage]

One Burst turned tightly to face the incoming Me 109. Both planes opened fire at point blank range, but the Me 109 did little damage. [Note that we have a house rule that allows overlapping planes to fire at each other]

Hollingberry continued to chase down the now servely damaged lead Stuka. The two Stukas caught Hollingberry in a crossfire from their rear-guns. [Note that when using the autopilot rules, the planes ignore the engine special damage]

Both the Me 109 and the lead Stuka, lost control and plummeted towards the water.

The remaining Stuka tried to turn away from the two Spitfires.

One Burst exchanged fire with the Stuka. [Note that we have a house rule that allows overlapping planes to fire at each other and when using the autopilot rules, the German planes ignore the rudder jammed special damage]

Both Hollingberry and One Burst's Spitfires were now full of holes and in a bad shape. The Stuka was still in good condition. Hollingberry turned away, gently coaxing his limping Spit homeward.

Even One Burst turned for home, not wanting to face the Stuka's rear-gunner.

The convoy ignored the downed German pilots. The Stuka got on its radio, the Luftwaffe's search and rescue organisation sent out a red-cross marked Heinkel He 59 C floatplane to pick up the downed aircrew.

Both Spitfires returned safely to Little Bobbington aerodrome. That night, the kills were celebrated by the squadron in The Drunken Duck, the pub located just outside the aerodrome perimeter fence.

It would take a while to repair both Spitfires, so two new replacement planes were flown in very early the next morning, so our rather hung-over heroes were ready yet again to scramble.